

ServiceNow recently released the Zurich version, and among others, there is one significant game changer for UI Builder – a Component Builder. We can now create reusable components directly in UI Builder, without leaving the environment and without coding. Let’s take a look.
Bridge to cross
ServiceNow went pretty a long way with UIB over the years. They gave us Viewports, Page collections, … It’s kind of reusable pieces but with a lot of limitations, and we couldn’t really reuse and scale our implementations properly.
The only way around was to go out and use custom component development via UI Framework. For me, it’s fun because I like development and coding 😎, but from a broader development point of view, it’s time-consuming and hard to maintain. And for updates, you always had to have a dedicated developer with Now CLI installed, etc.
Component Builder kills this pain.
Taking a look
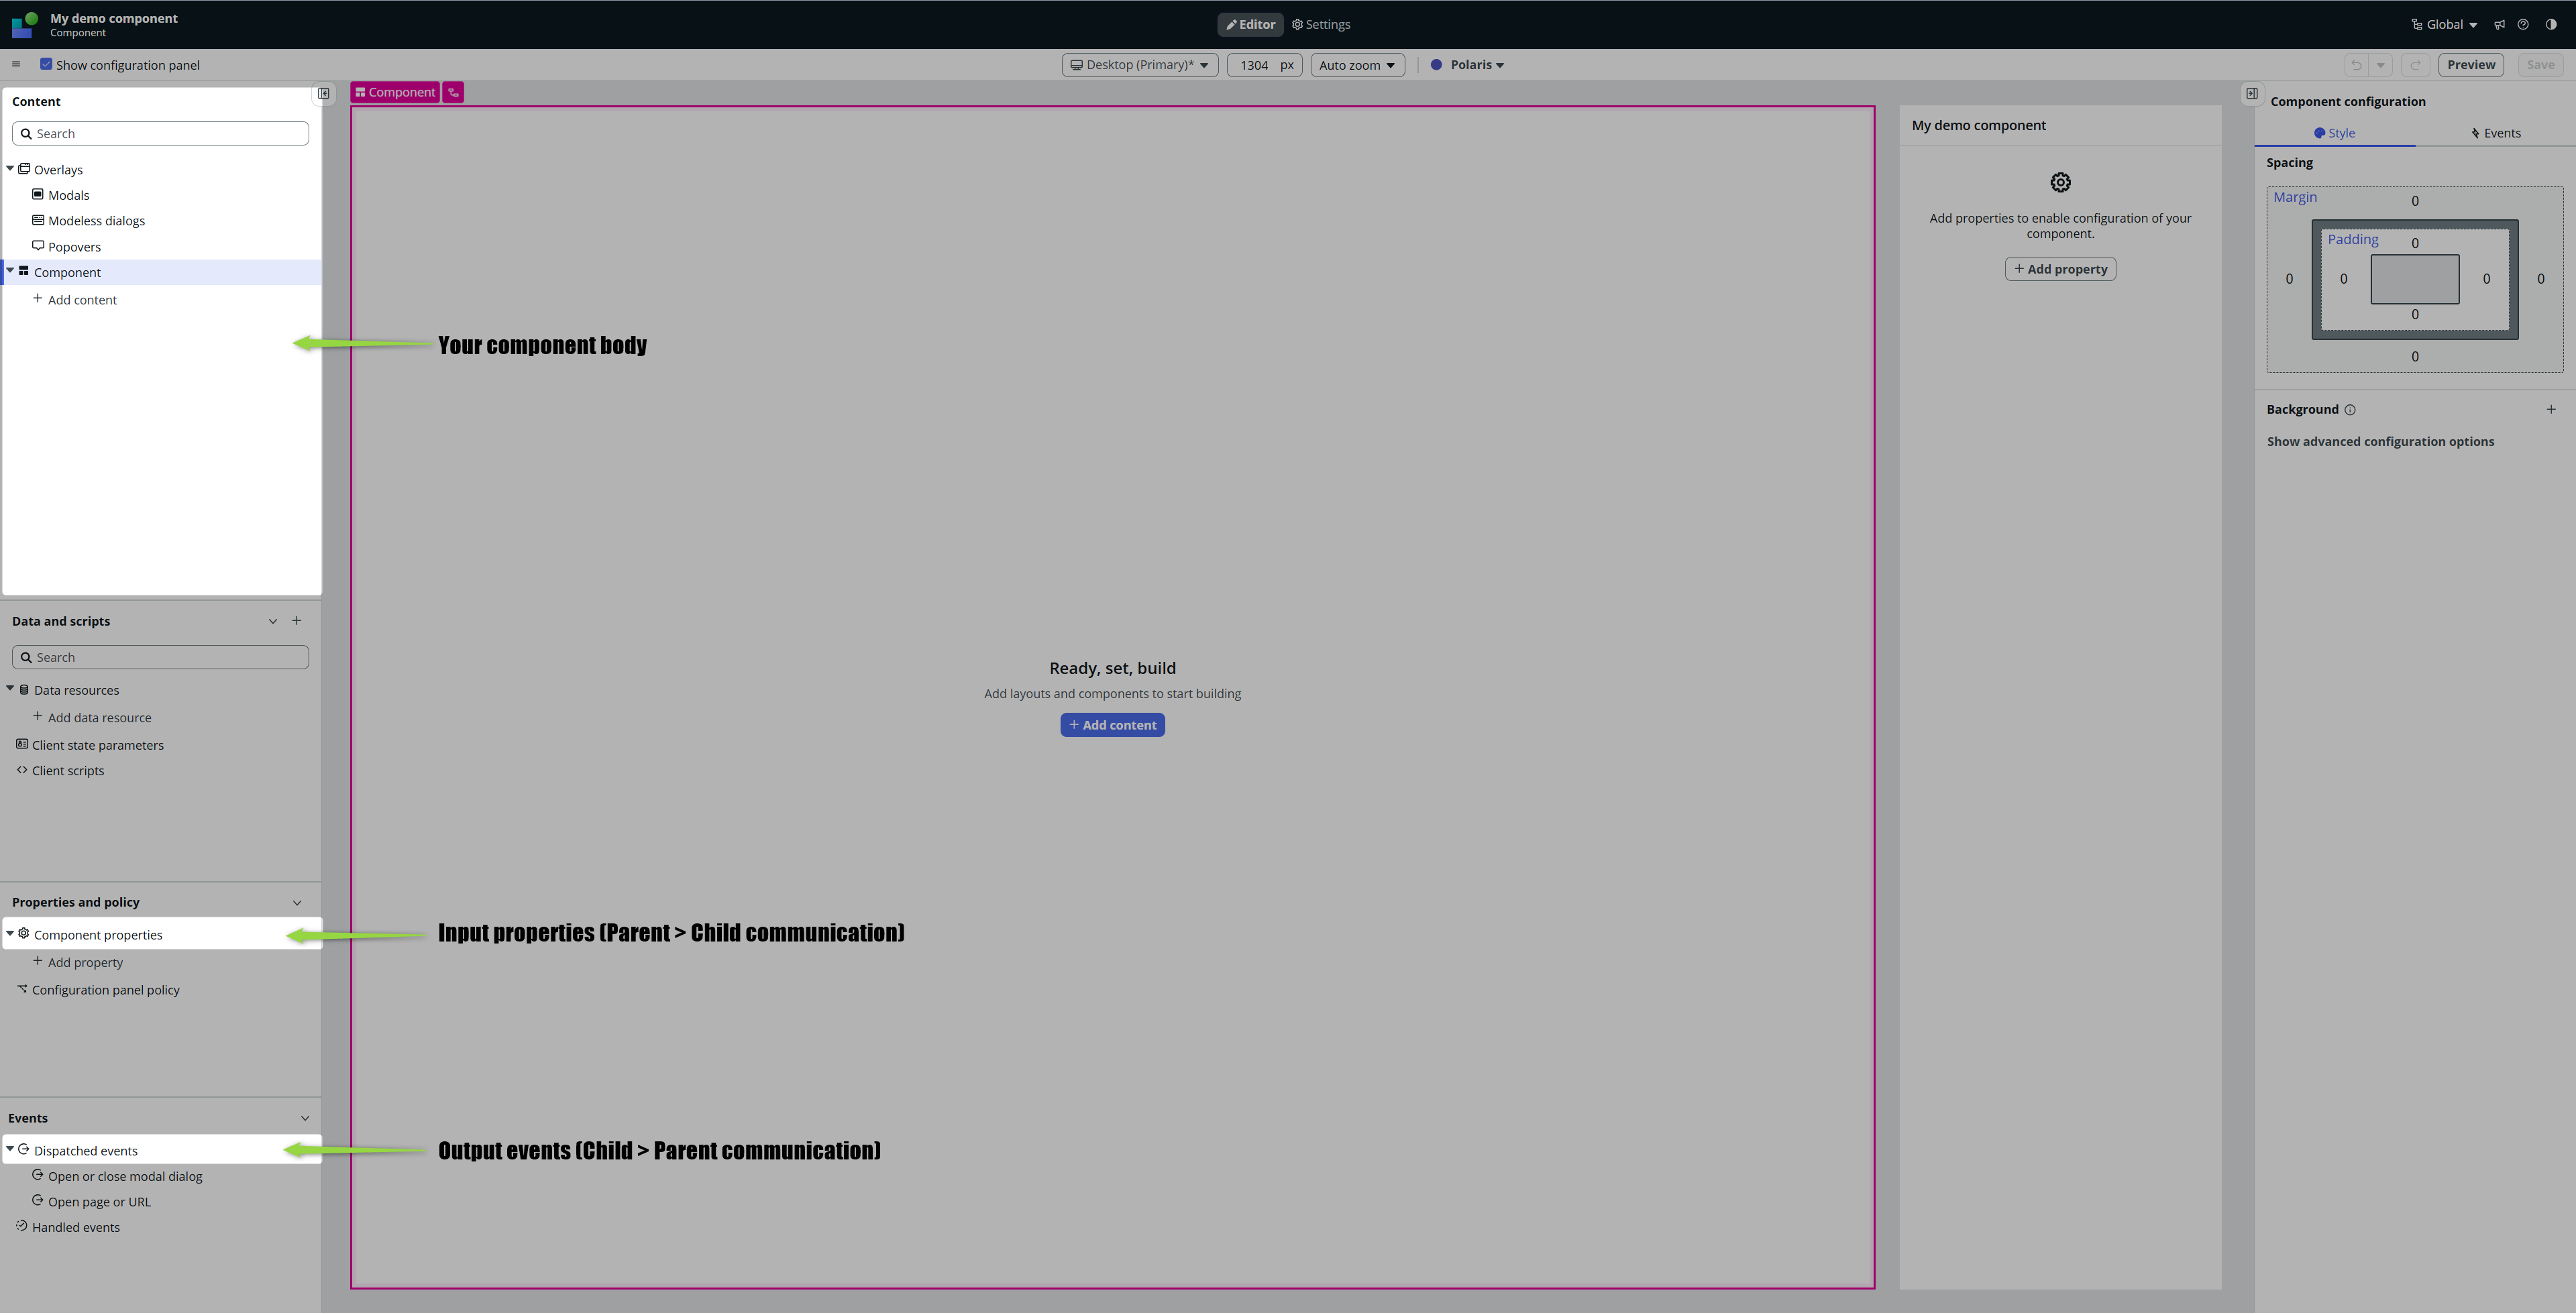
From my point of view, the thing that had to be done is to “ONLY” (haha, but there is a bunch of work behind this word) prepare the environment for a new type of Macroponent. But other than that, there is actually nothing so new here; the environment has been ready for this for quite a long time. We already have all we need:
– Properties for Parent > Child (our component) communication
– State for keeping inner information
– Dispatched Events for Child (our component) > Parent communication
And of course, all the other well-known features (data resources, …) are available for us there as well.
Having this in mind, we can now really create clean and scalable implementations, without having heavy pages that are hard to maintain.
For the impatients
Let’s take a look at a little punk here. Consider that you just migrated to Yokohama and the next version (the version with the Component Builder, which is Zurich) is only a matter of the beginning of next year. And you don’t want to wait.
Well, it seems like you don’t have to 💁♂️ but first, let’s create something.
Building the component
1. Go on Zurich instance, create a new Update set and make it current.

2. Open UI Builder

3. Go to Create > Component
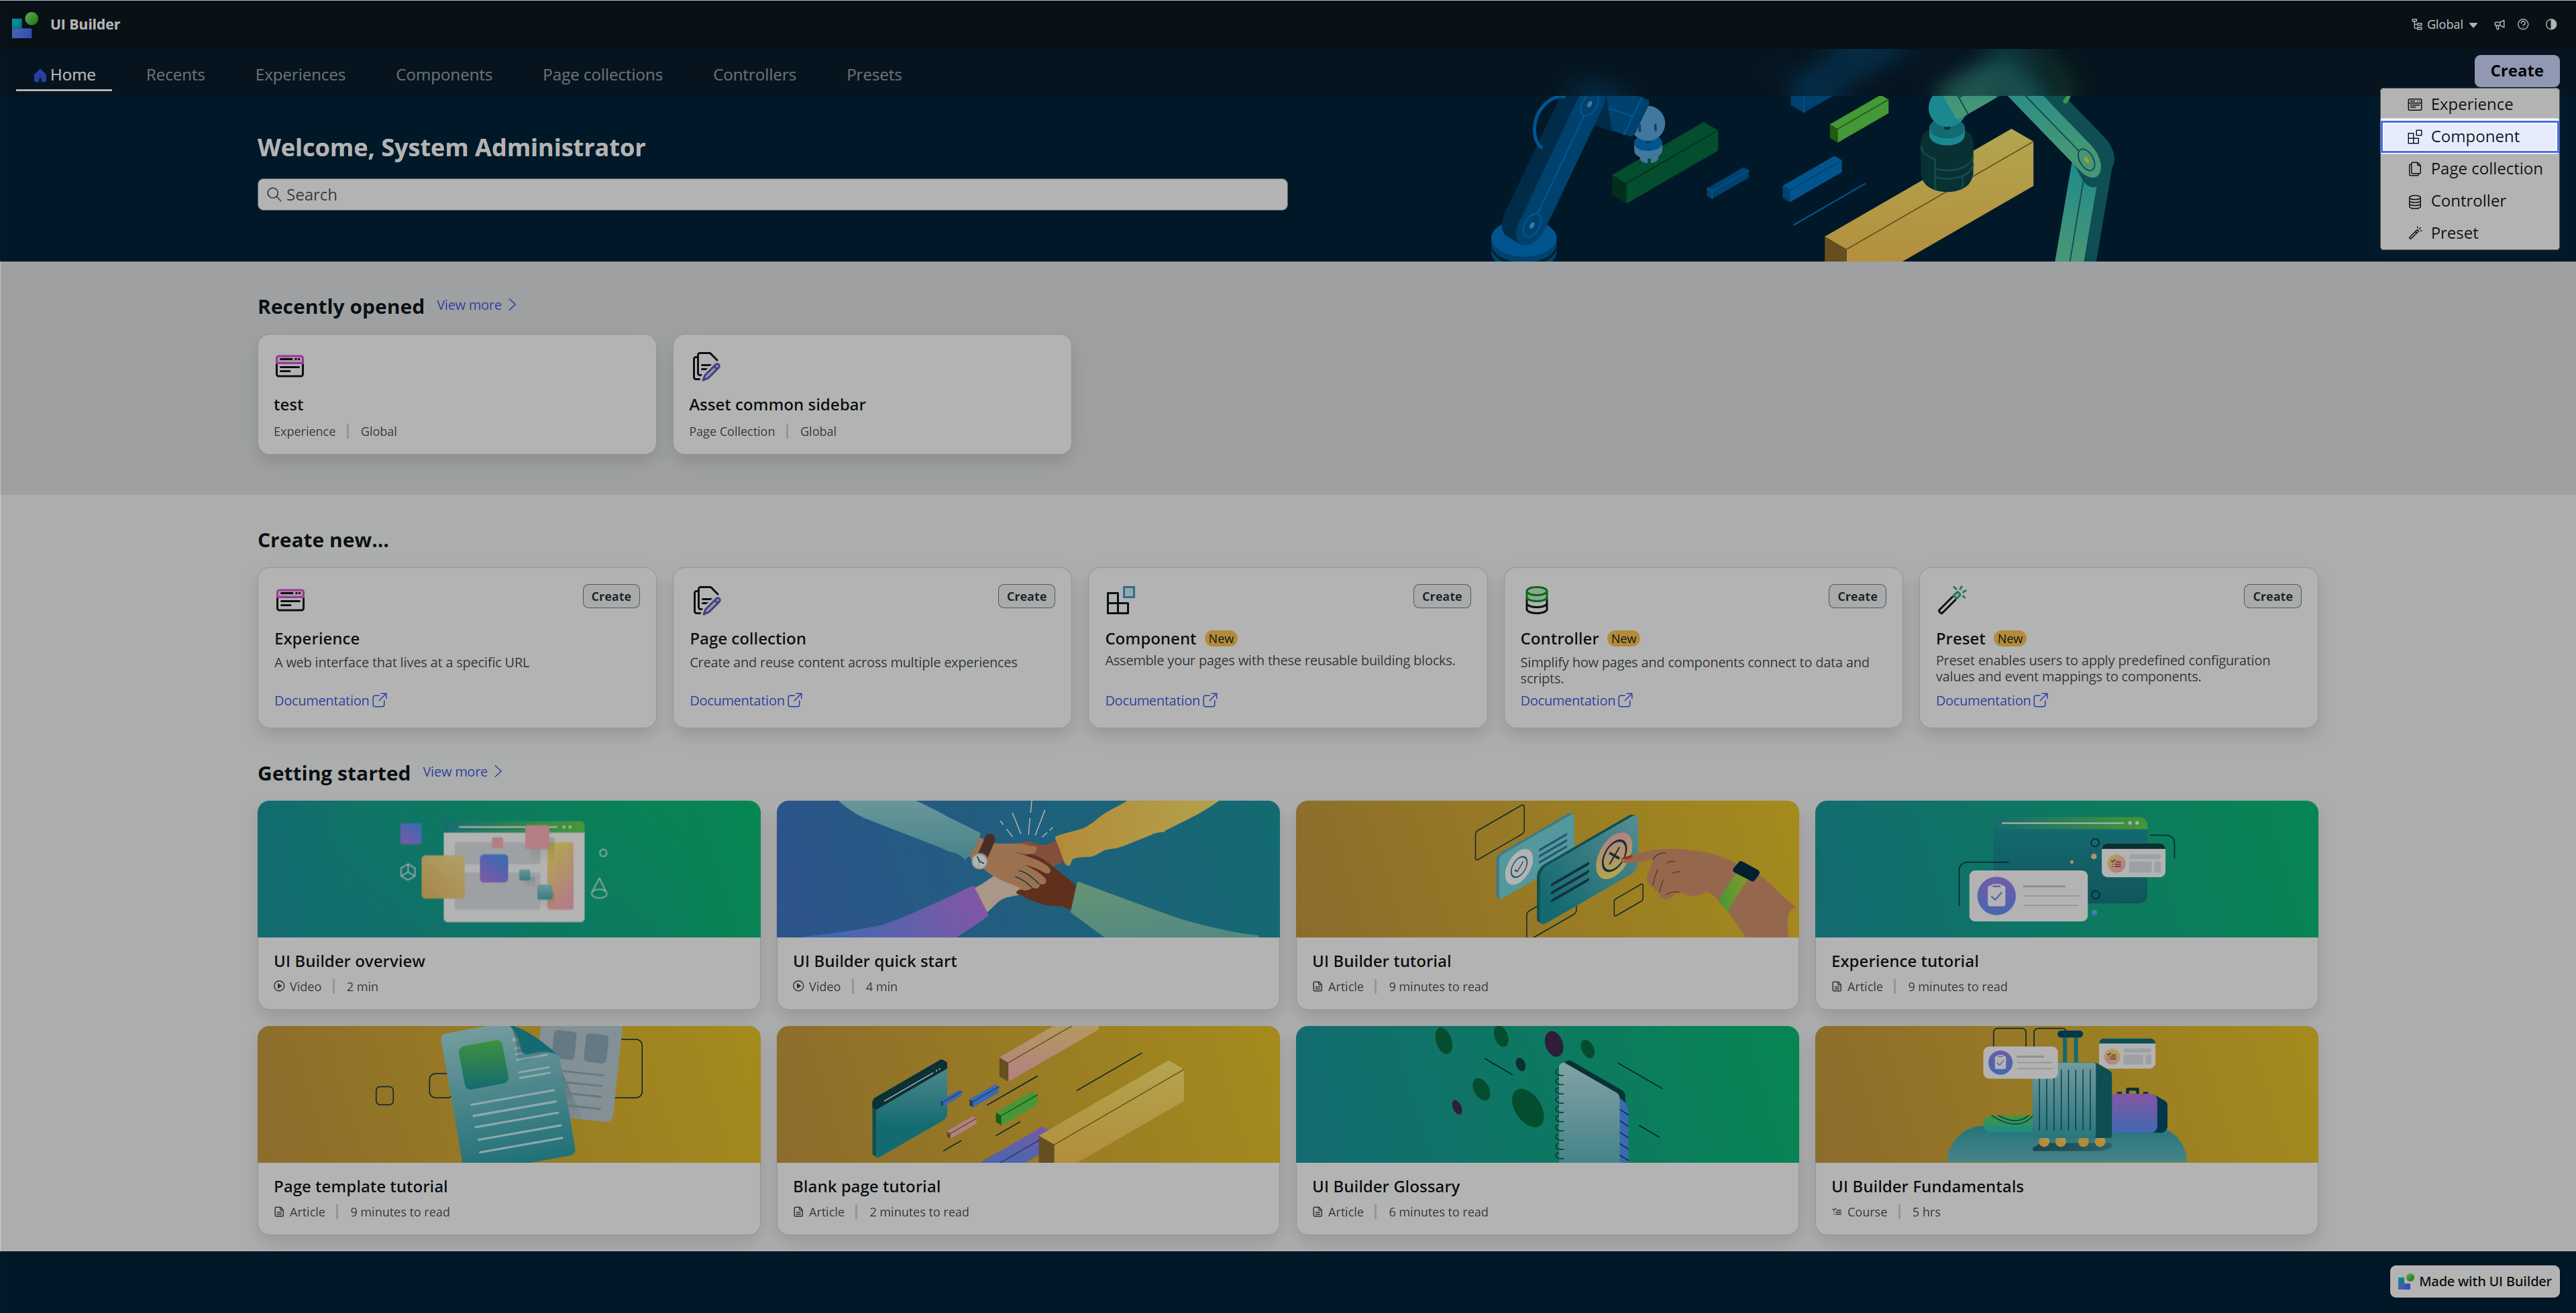
Make sure you have up-to-date version of UI Builder. If you don’t see Components, go to Plugins and install lates version.
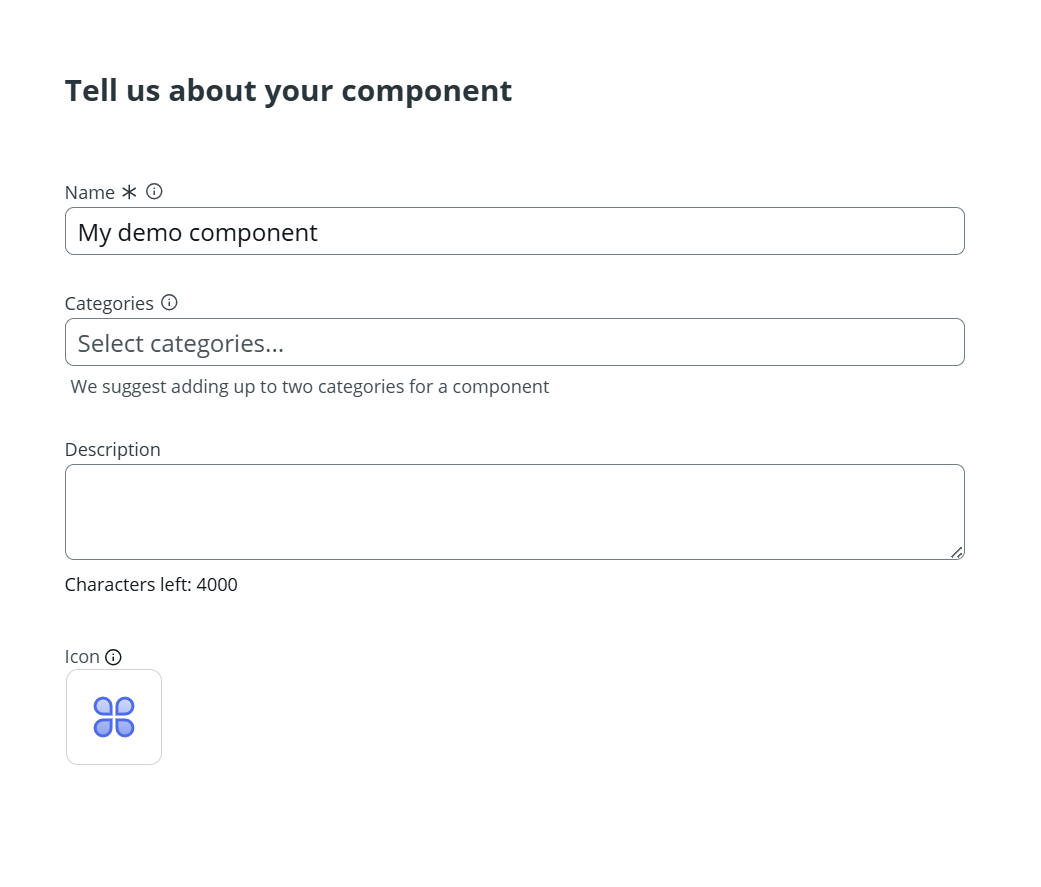
Give it a Name and Icon.
After you proceed, you will land in the well-known UI Builder editor, and you should really feel you already know what to do. 💪
The very fundamental building blocks (and you should already know in case you are familiar with component-based development) are inputs and outputs.
Cutom component
I’ll create a very simple component: as an Input, there will be text for the Header of the component, the component itself will be a counter (counting +1 on button click), and each click will dispatch an event so the Parent can handle it.
The very basic ugly start would look like this 👇
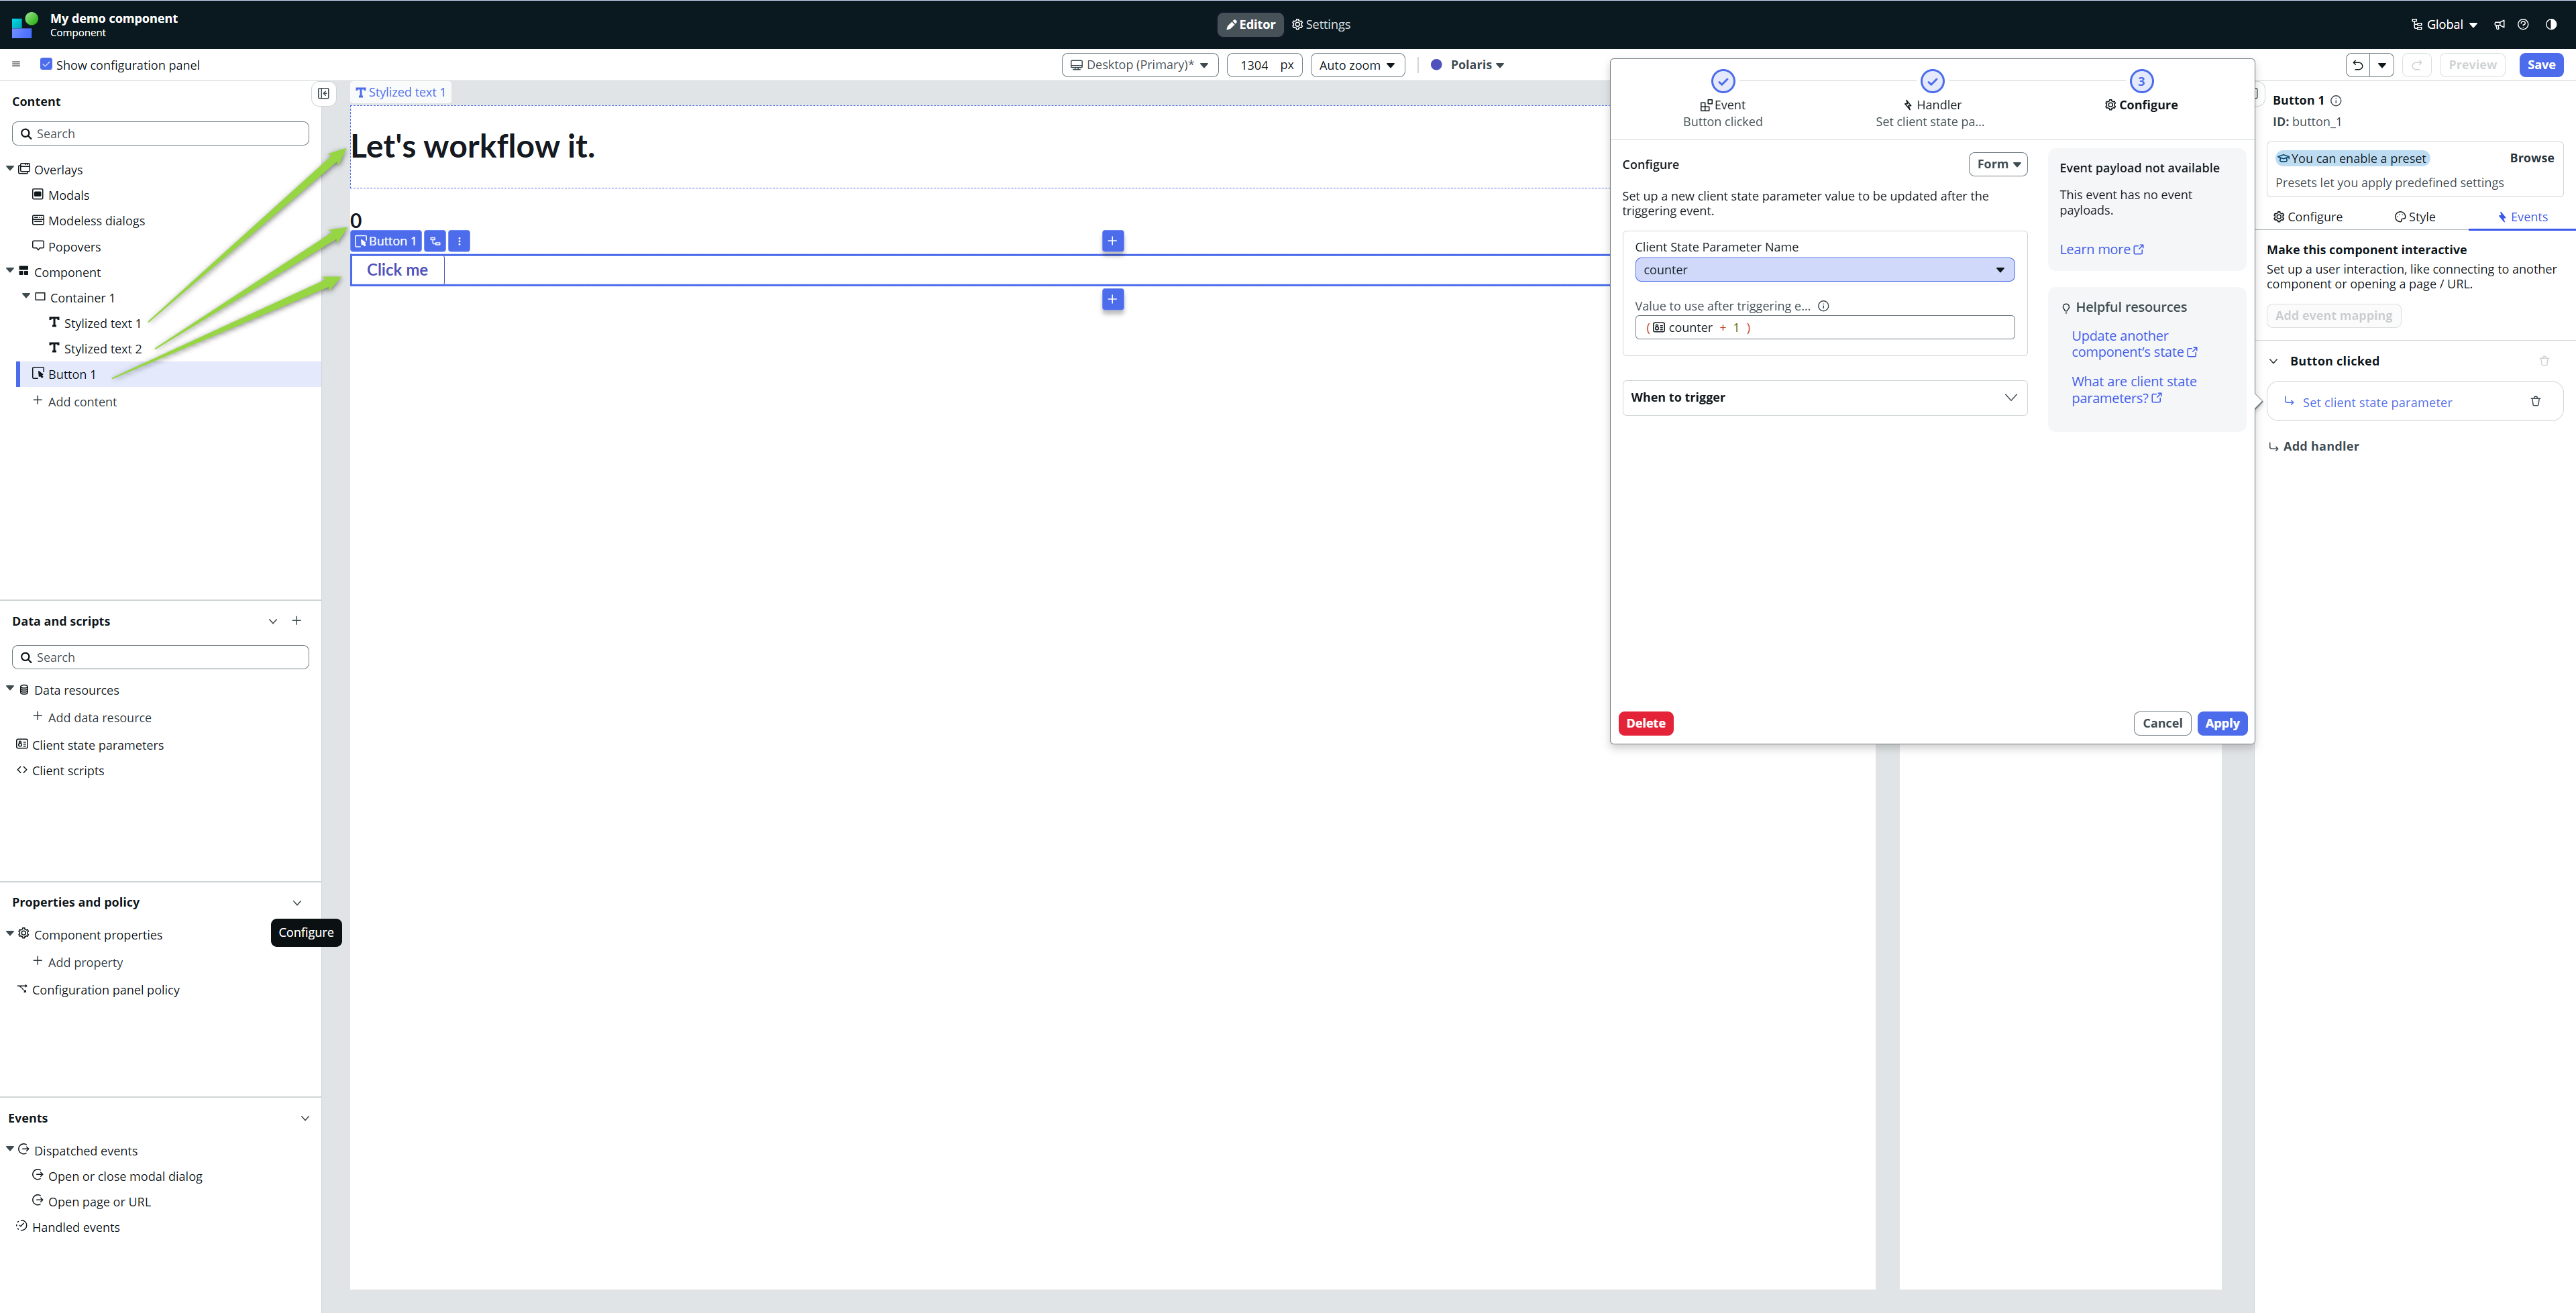
Stylized text 2 is connected to the state “counter,” and every button click adds +1 to the counter.
Component property
The interesting part starts here. First, we want an input property for our header. Go to Component properties and create a Component Property.

Then bind this property to the value of the stylized text 1.
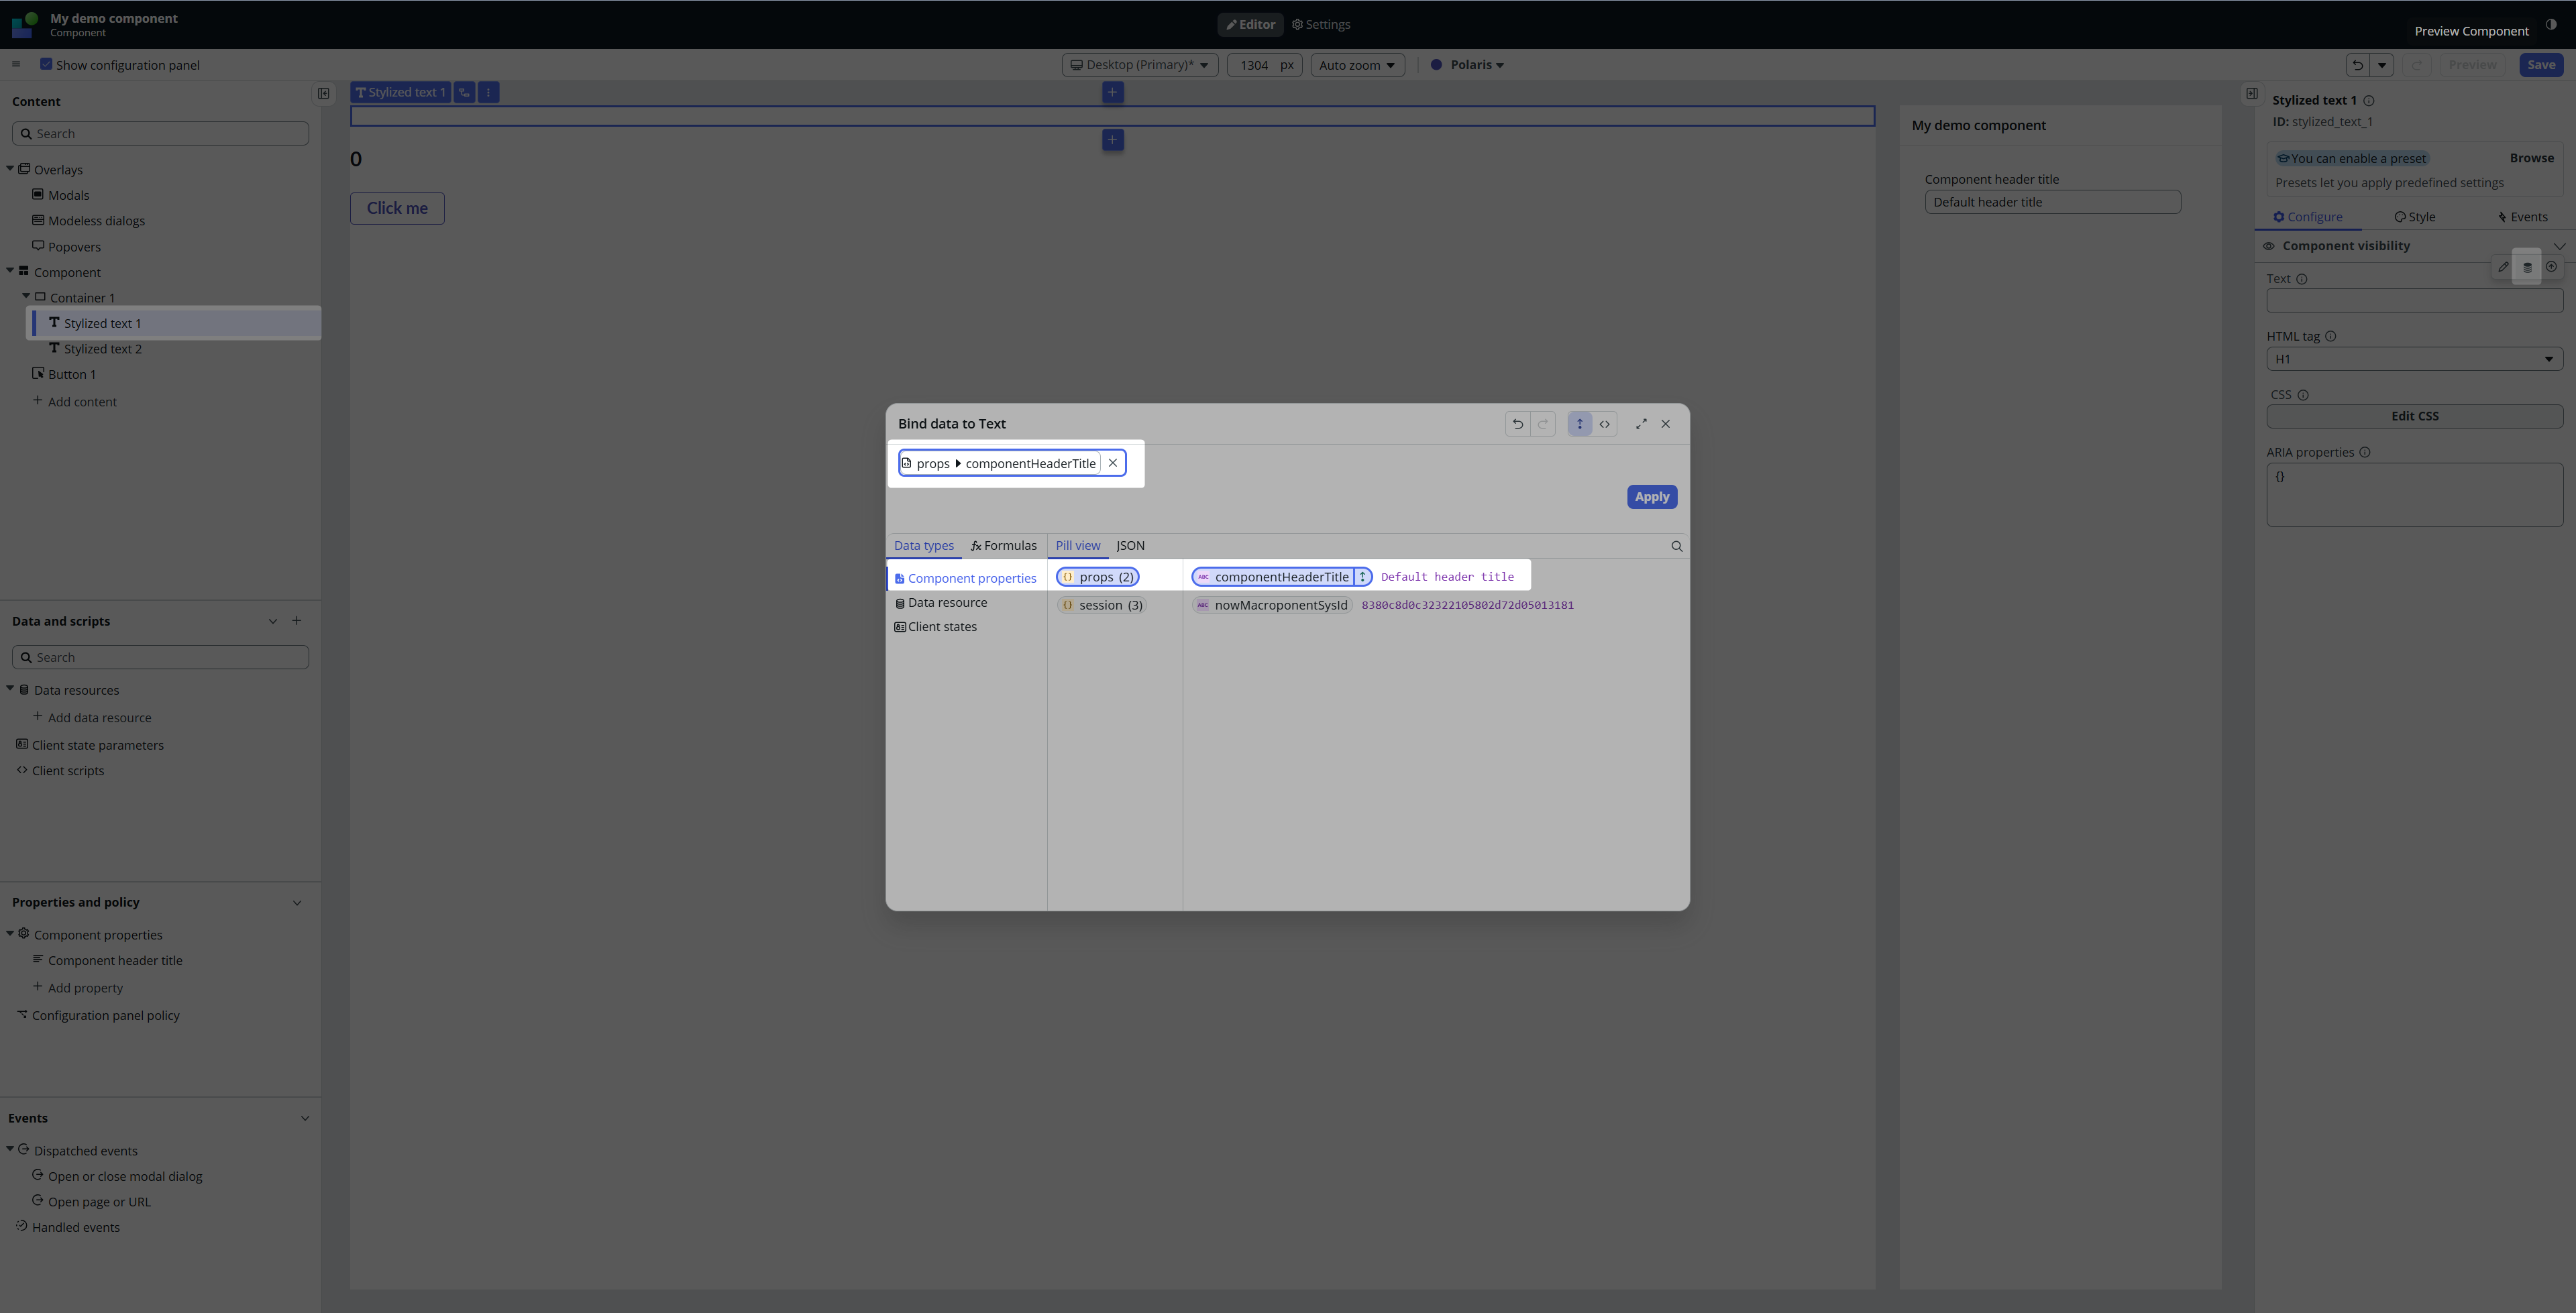
The stylized text 1 now contains the default value of the property.

Dispatched Event
Now, we want to send the counter value out of the component to the Parent.
Go to Events and create a new Dispatched Event – give it a name and, after you open the Advanced mode, provide a Payload field. The counter value will go in this payload field later on.

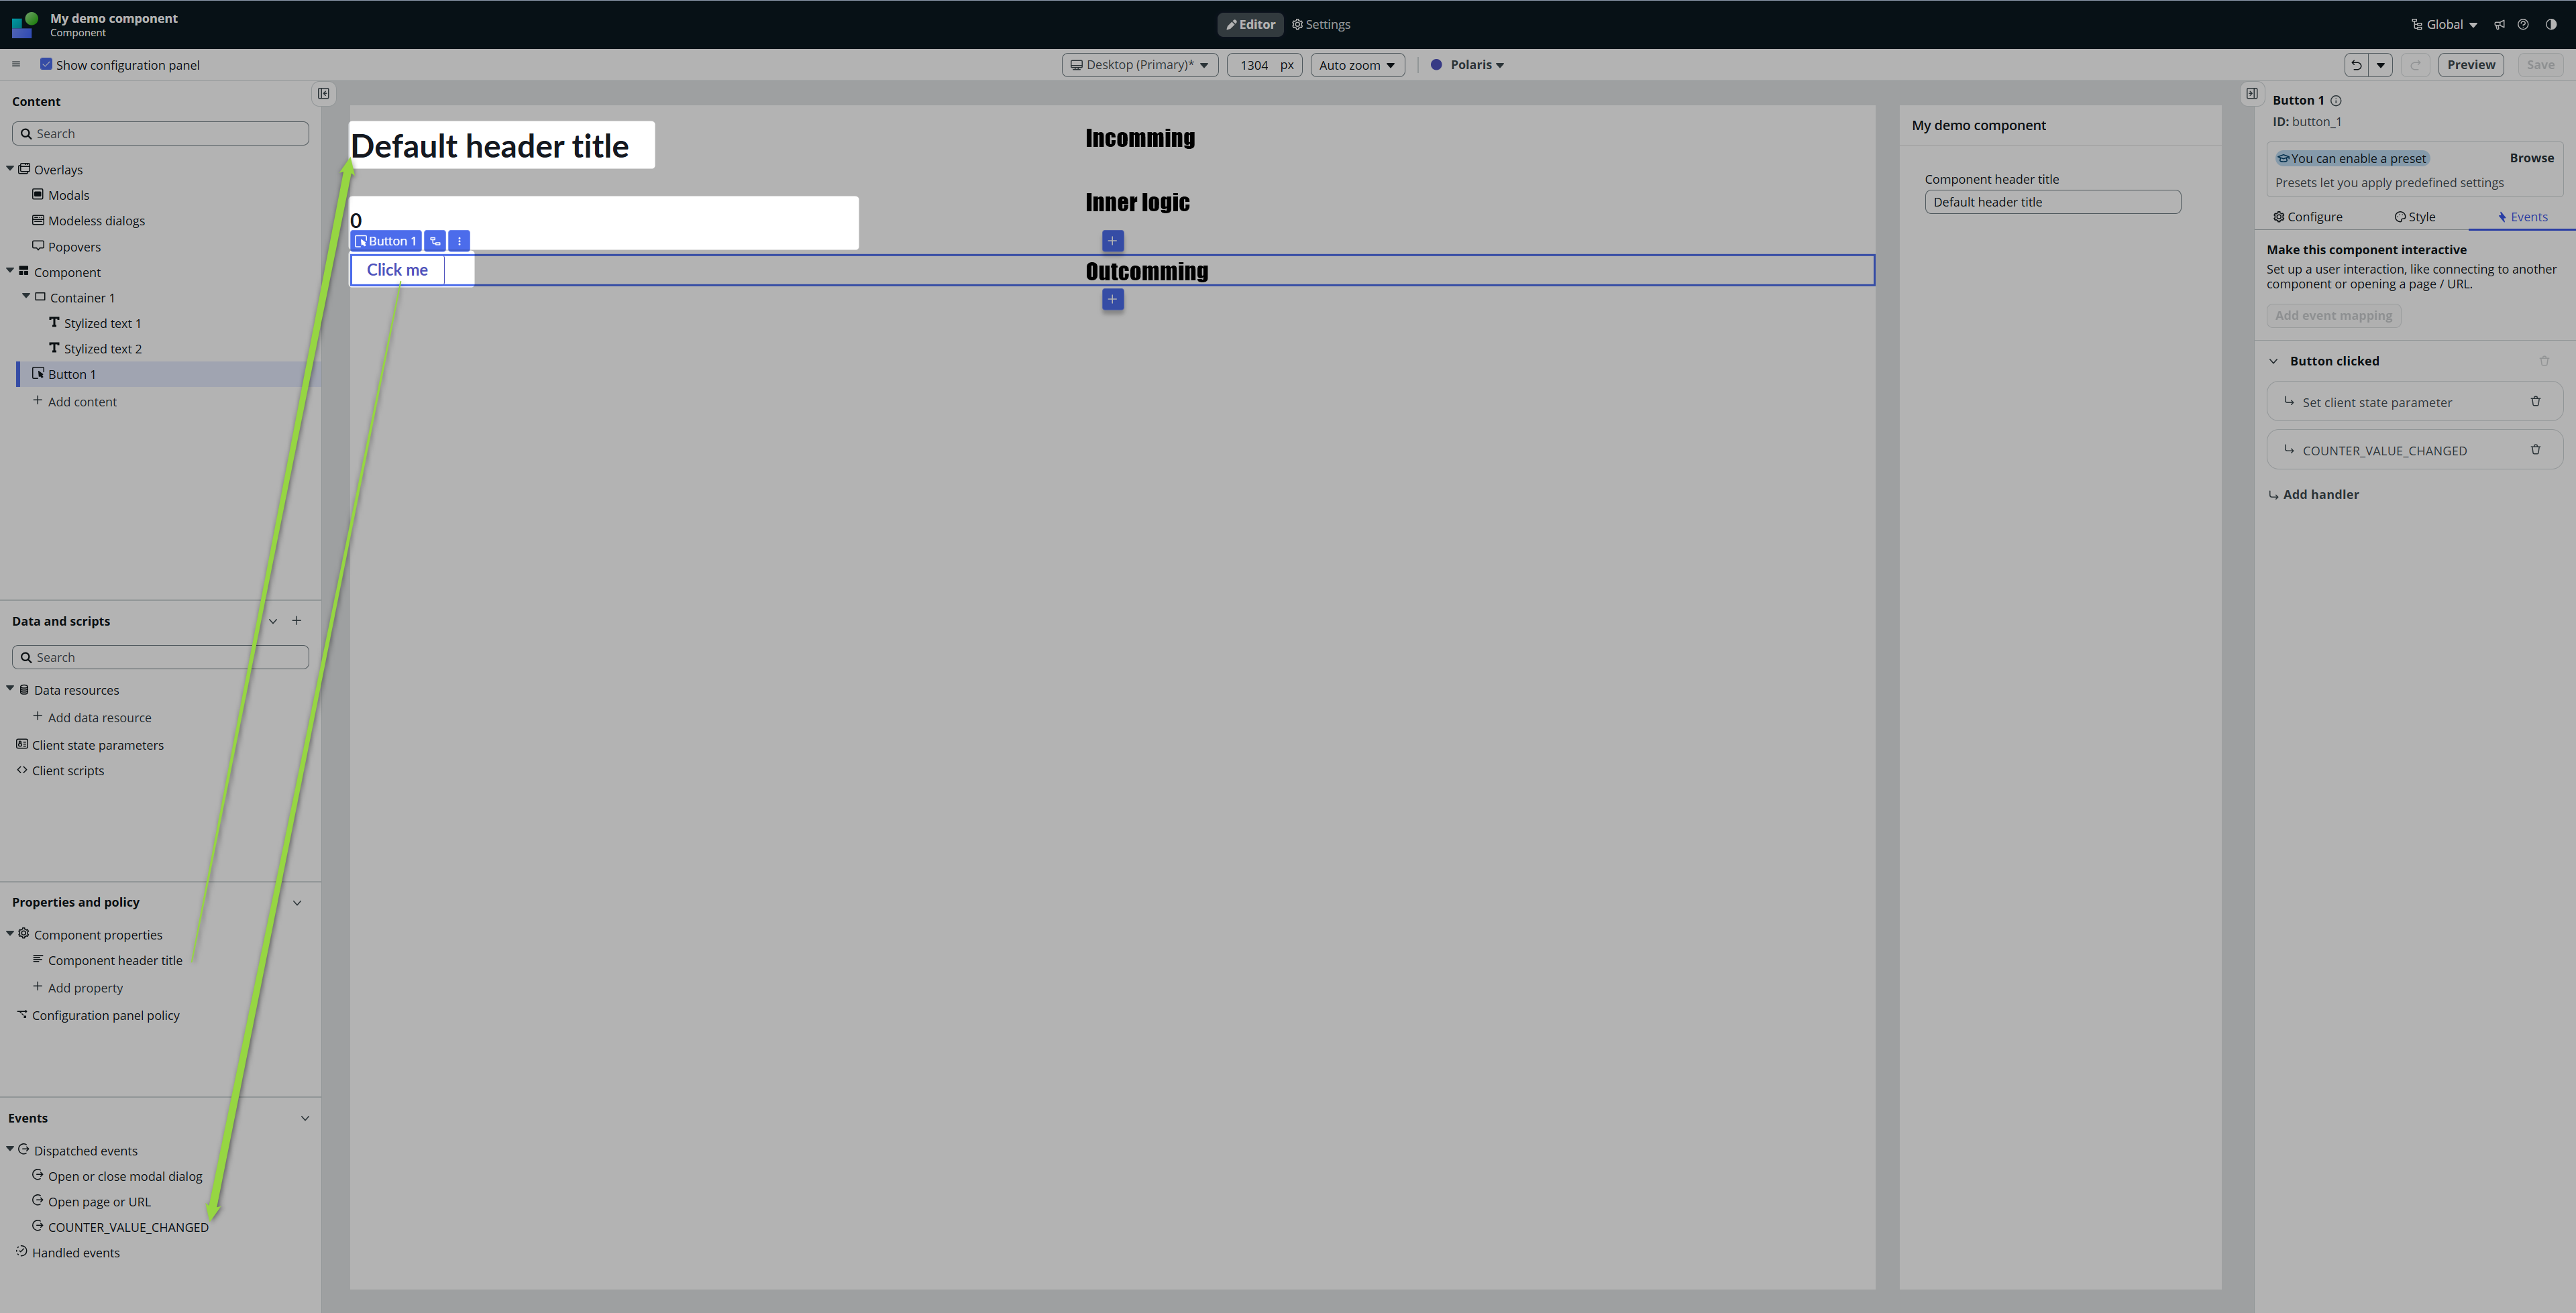
Now go back to the Button and add an event handler that fires our dispatched event with the value of our state.

Now, our Custom component should be ready. It’s got something that comes in, some logic, and something that comes out.
For the impatients – punk’s here
To close the punk part for the impatient, go and take a look in your update set now.

If you export this update set to XML and commit it on Yokohama (even Xanadu should be fine, but I tested only Yokohama), your custom component will appear among other UI Builder components and it will work 😎🚀 I believe there should be no limitations as Yokohama is PROBABLY already ready for custom components and the only missing part is the front-end face (the component builder itself), so the engine should handle it easily. But I hope it’s clear that this approach would not be supported by ServiceNow in case of any troubles. That’s why I say it’s punk.
But I like punk 🙂
Testing time!
Now let’s test our Custom component.
Go to any Page – new or existing, part of Experience or Page Collection; it does not matter. Just find some place where you can put some components. I created a new Experience with one Home page.
Try to find your component. If you saved it, you should be able to find it.
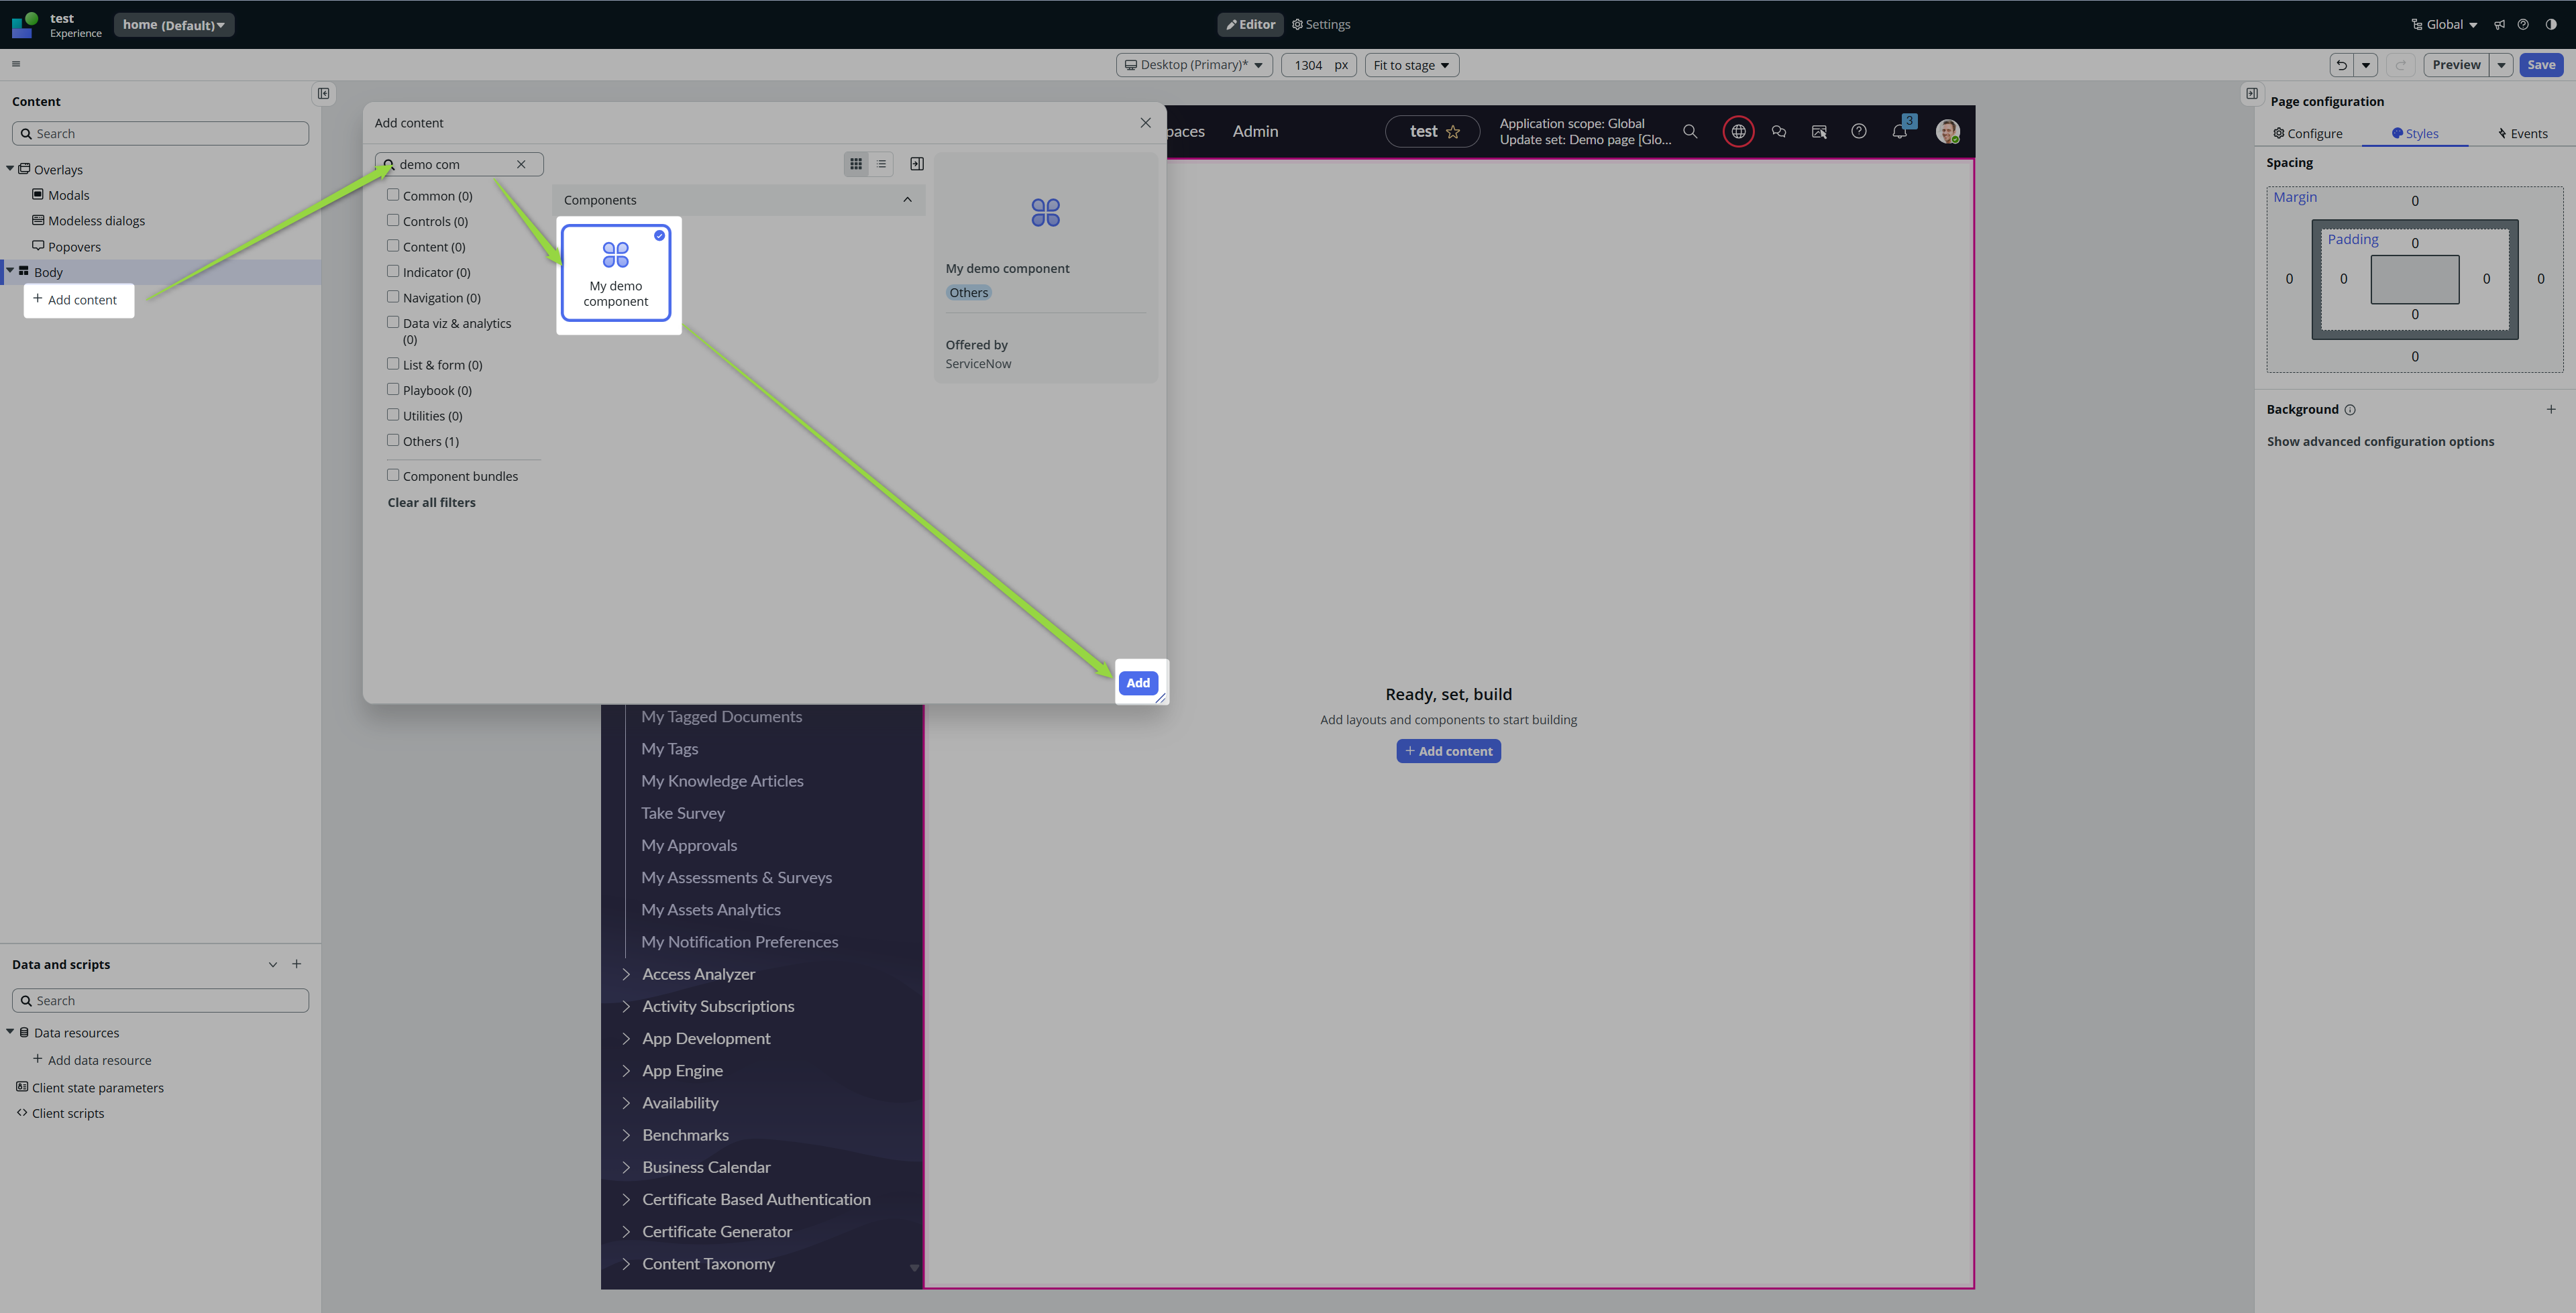
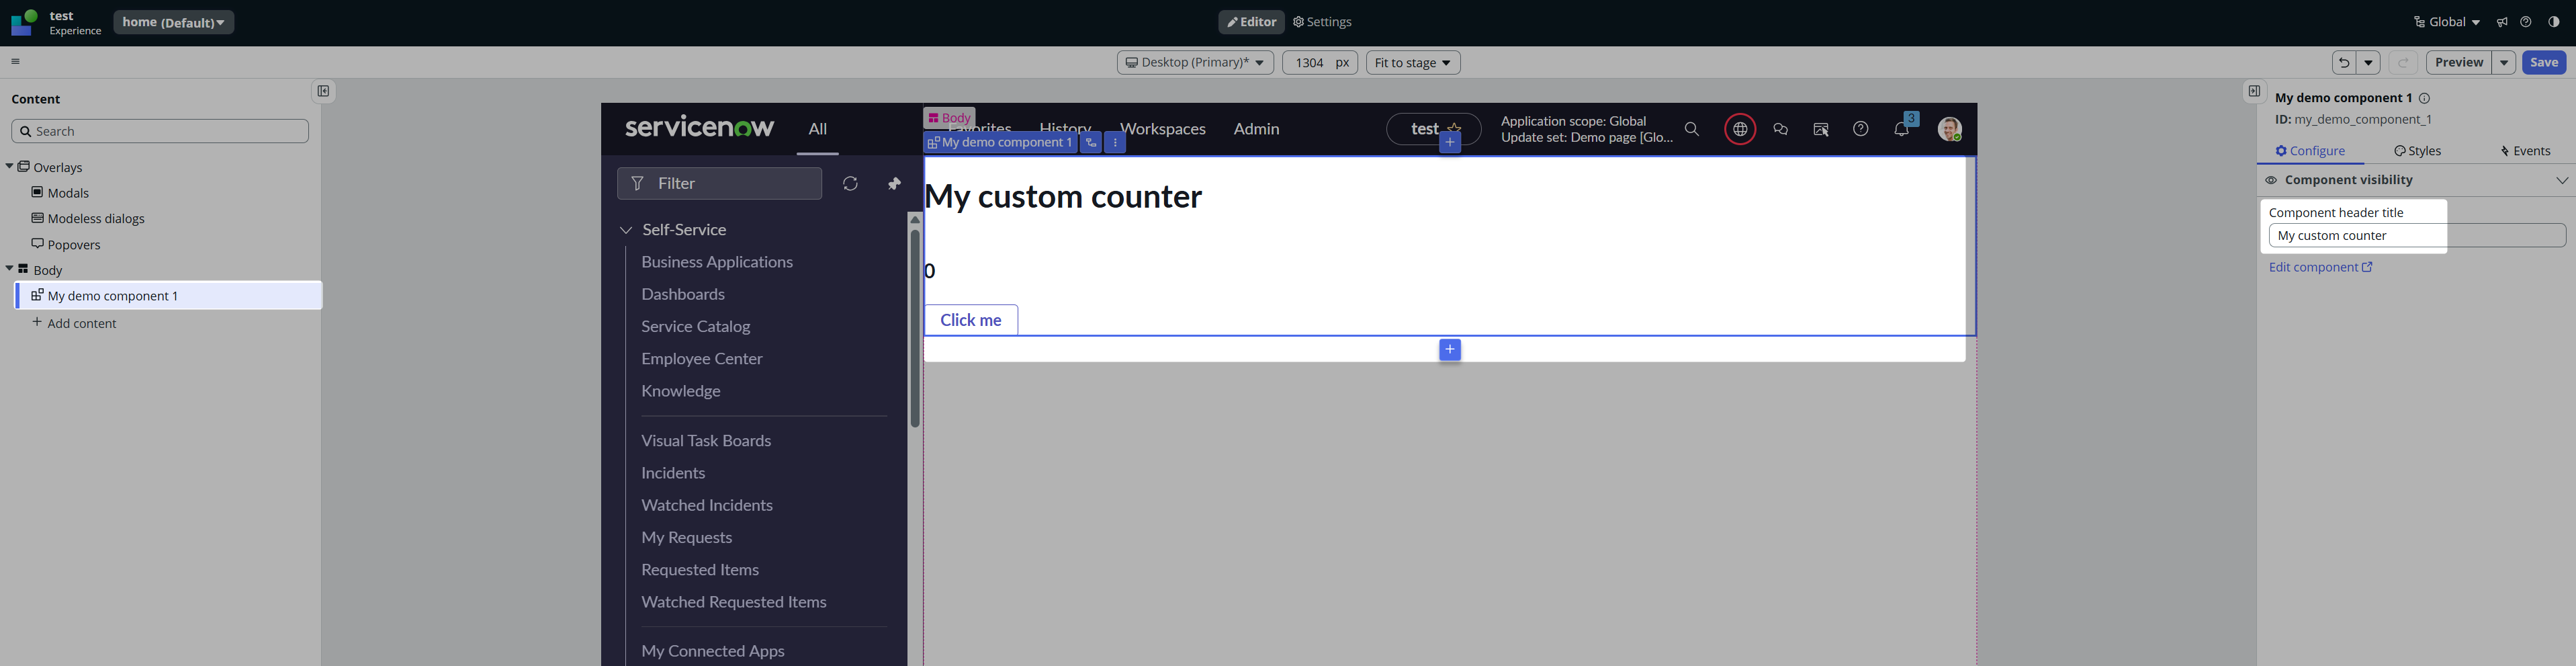
For me, it worked on the first try. And take a look, the property is available for change. I changed it right away.
The last thing is to verify whether the Dispatched event works.
Create a new state on your Page, for example, “catchedCounterValue,” and bind it to some stylized text, like that 👇

After that, click on your component and add the event handler COUNTER_VALUE_CHANGED.

Then bind the payload value to your page’s state.

And this is it, isn’t it? When you save the page and click on Preview, you should see your custom component, and when you click on the button, you should see it populating your page’s state with the value of the counter, right? Right? RIGHT?
Nope 😛
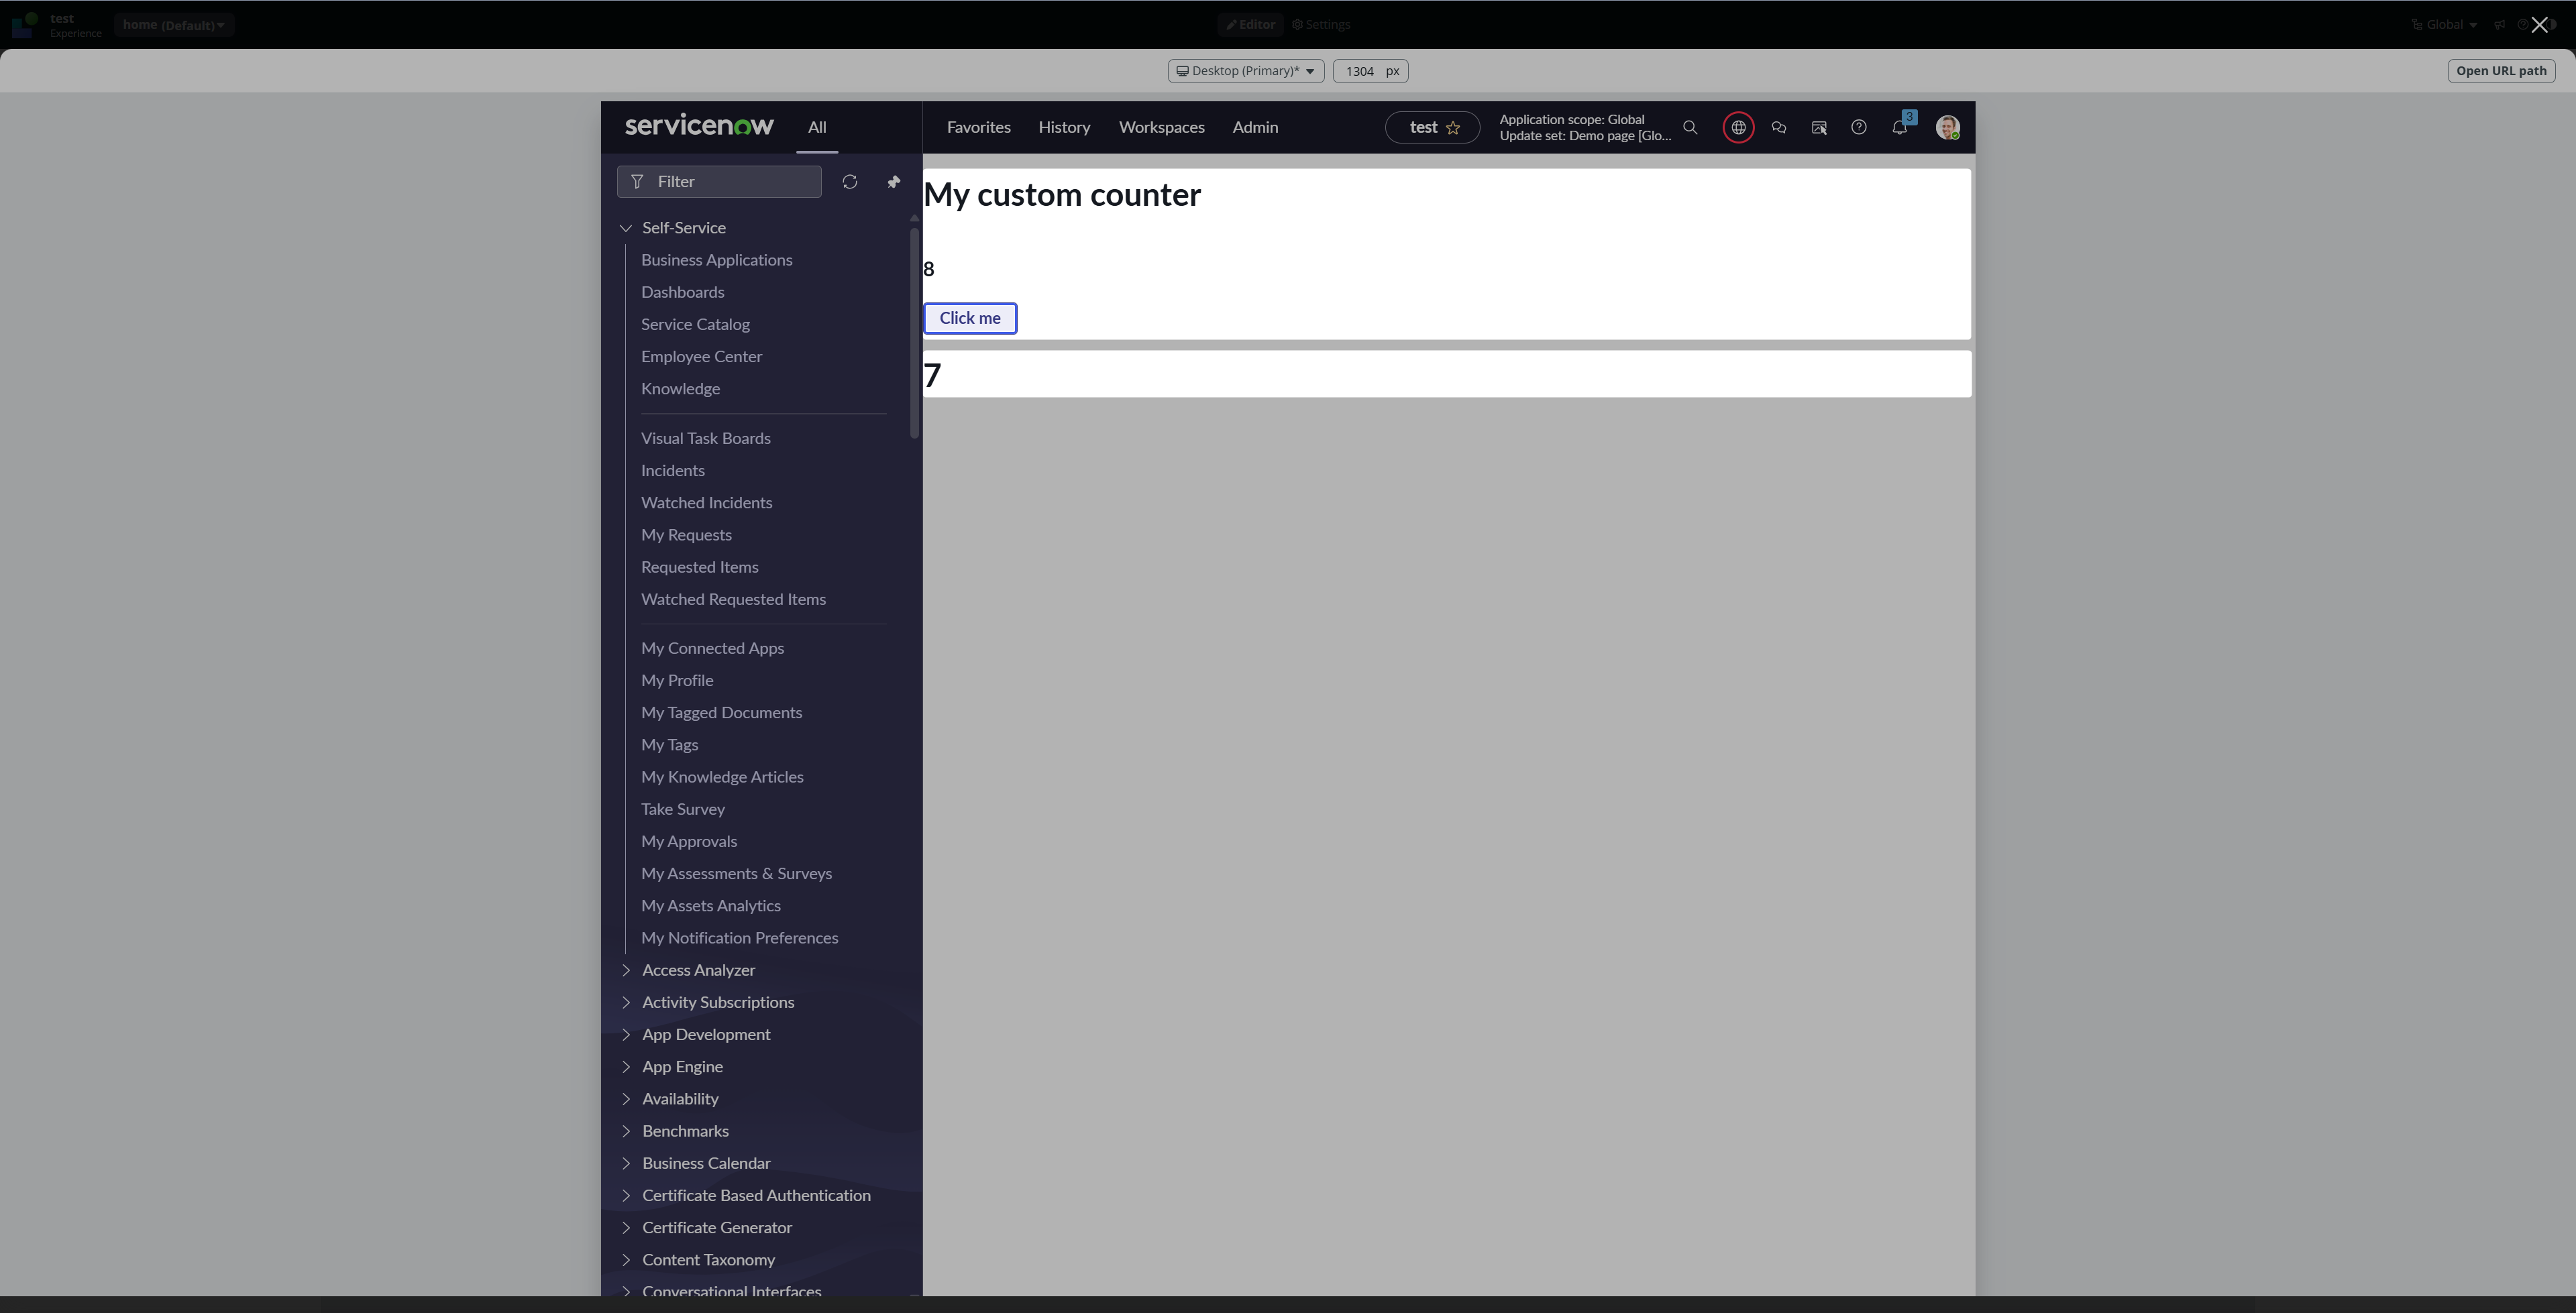
And this is the lesson I wanted to give you. If you went step by step with me, you will notice that the Page’s state is always one value behind the component’s state.
That’s because 👇
Everything is ASYNCHRONOUS
Go back to your Custom component. You can either start from the very beginning through the UI Builder, or you can just click on it on your Page and click on Edit component.

Go on the Button > Events and take a look. Those actions ARE NOT sequential. The engine just handles them asynchronously, and you never know the order or the result.

In our scenario, we set the state and immediately fire an event with the value of that state, but no one can guarantee that the state gets updated when the event is fired. As we found out, the event fires the current value of our state; it does not wait for a new value. It does not even know that something else is currently updating the value.
Correct implementation
We need to make sure that we calculate the new value first, and then we can start any async (parallel) operations because after the value is calculated, we don’t care about the order of the operations, right?
We will handle it with the help of a client script. Create one in your custom component.

You can see that I first calculate the value and then I call both async actions.
Now go to the Button, delete both event handlers, and implement a new one that calls the client script you just created.
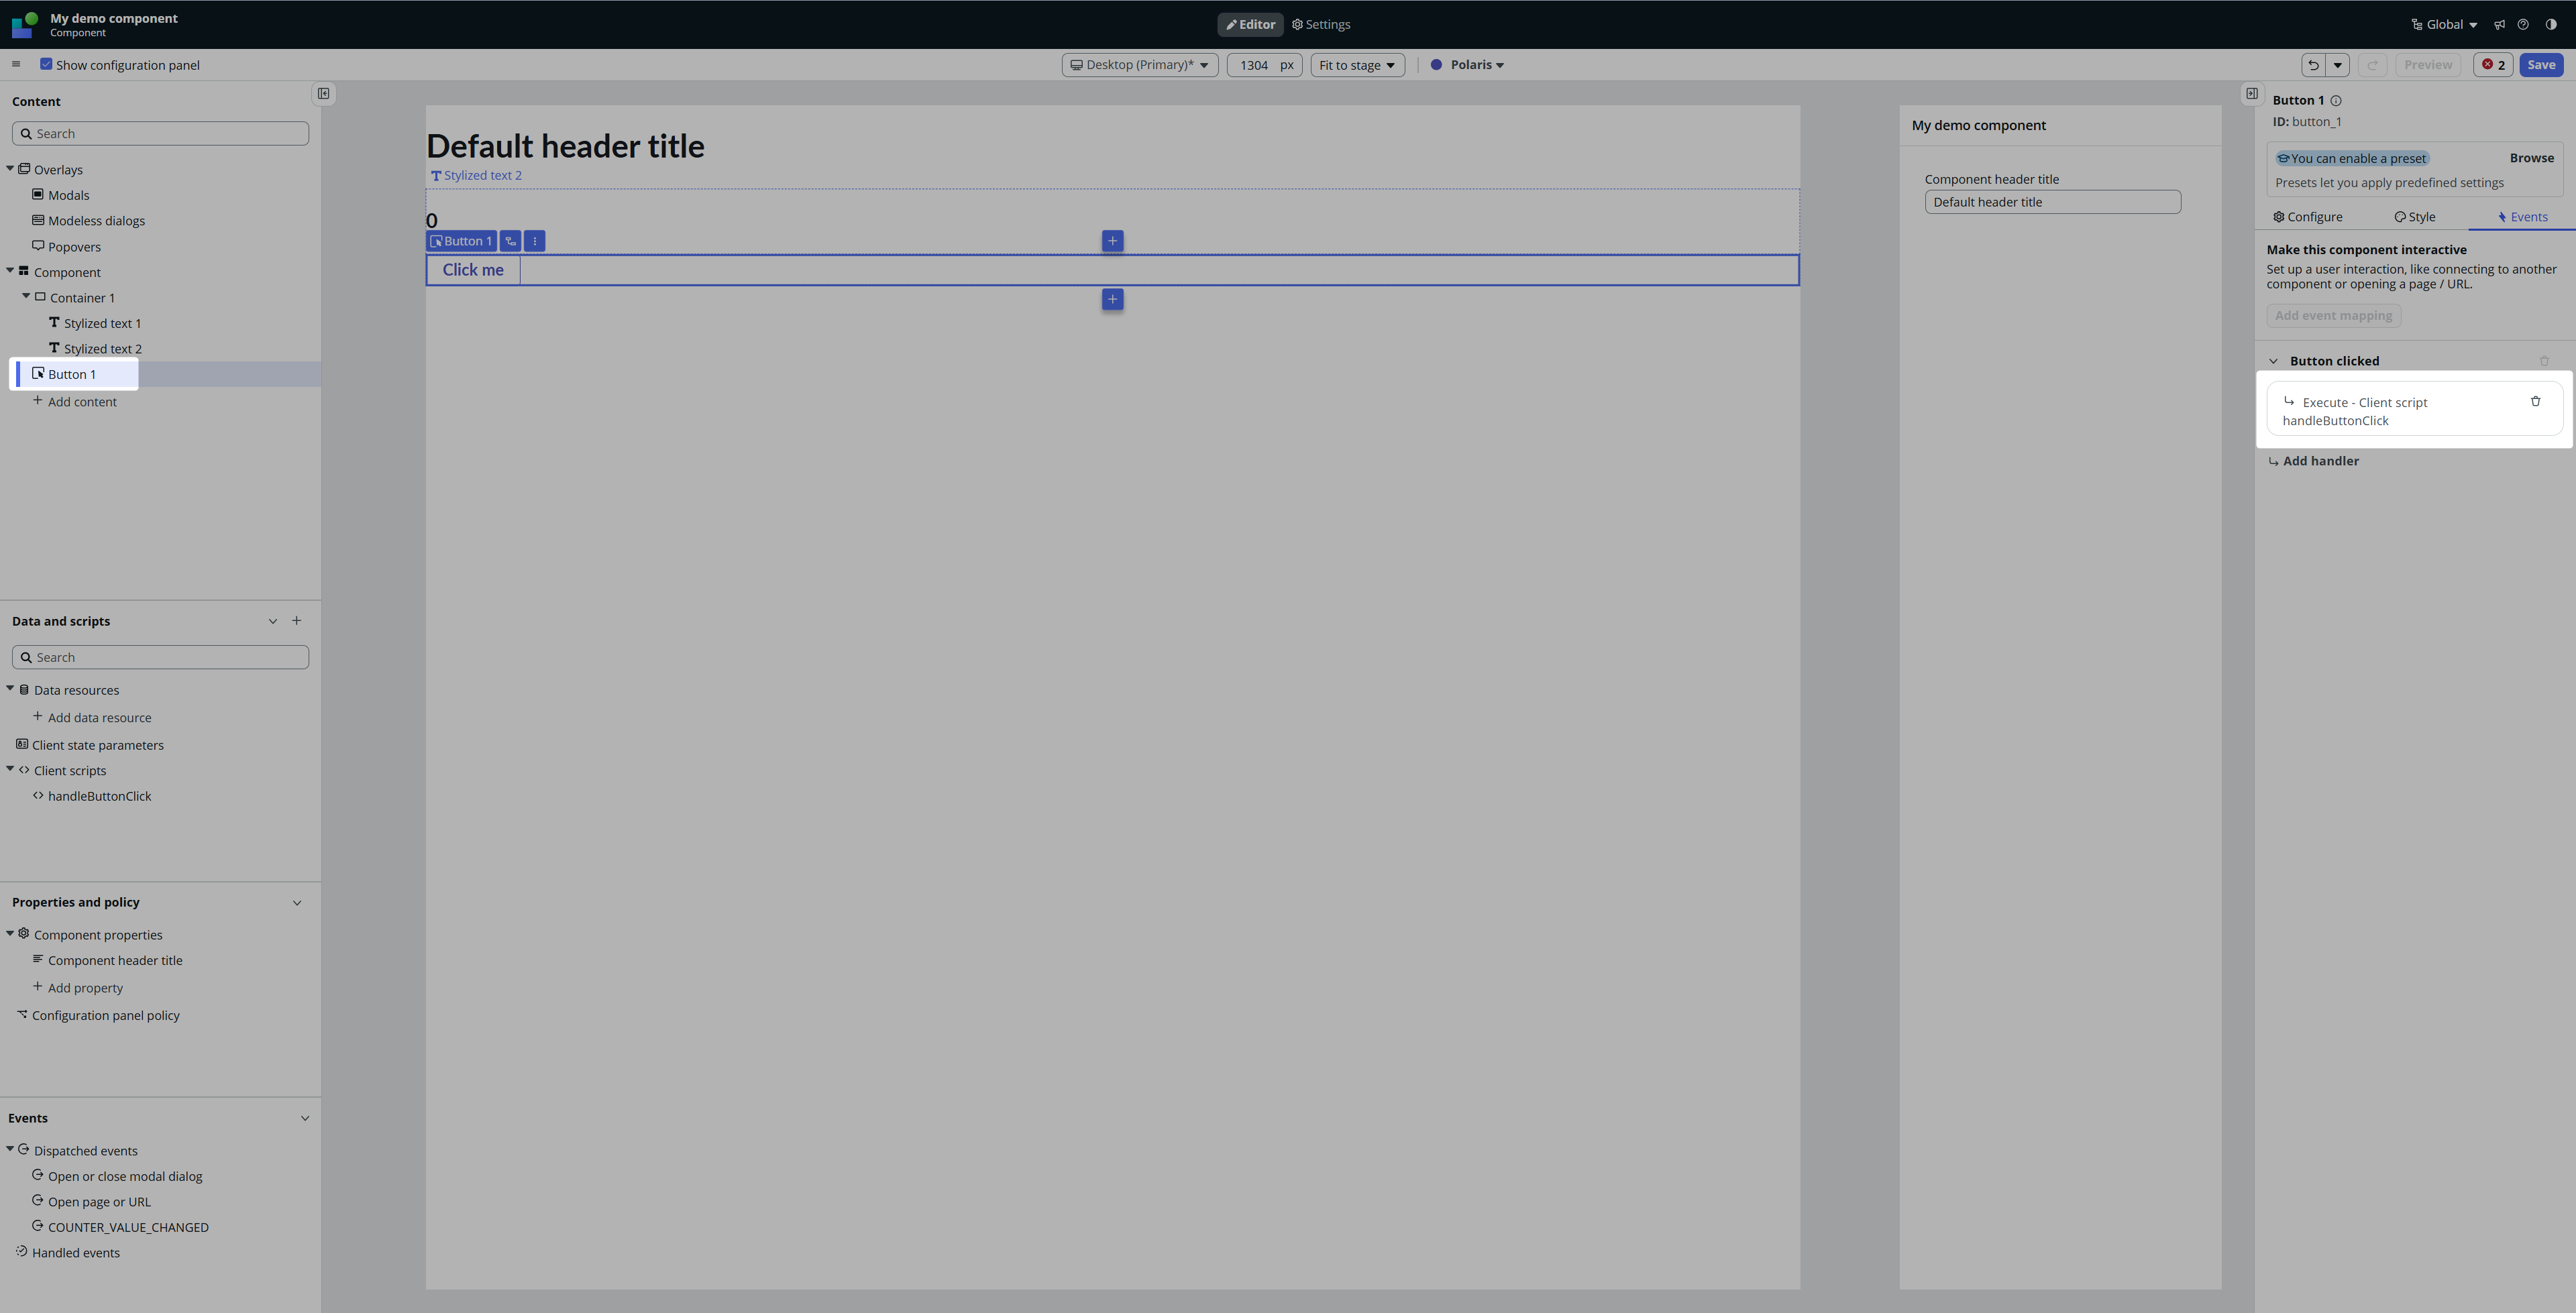
Save it and refresh your page. The counter on the page should now be in sync with the counter on the component. 🚀

Magic 🙂
Conclusion
Component Builder is a real game changer. It finally brings a clean and scalable way to build and reuse UI components directly in UI Builder.
The challenge now is not the technology itself, but governance:
👑 Ownership – Decide who manages and approves new components. Is it one architect, a small “UI library team,” or distributed ownership with code reviews?
🎨 Consistency – Align on naming, property structures, event naming conventions, and visual standards so that components feel like part of one system.
♻️ Versioning & lifecycle – Treat components as living assets. How will you update, deprecate, or replace them without breaking pages that already use them?
📐 Scoping – Agree on the right level of granularity. Don’t end up with dozens of tiny one-off components, but also avoid one “god component” that does everything.
Handled well, Component Builder becomes the backbone of clean, scalable workspaces. Handled poorly, it turns into a jungle of mismatched pieces. There’s no single answer, but every project should start this discussion before the library gets unmanageable.
See you later 😎
Jan

Leave a comment