

There is a nice article written by MGOPW here. I wanted to extend it a little bit, especially for those cases when you don’t have access to DEV Tools / NED Tools (I don’t; don’t ask me why 🤷♂️), and moreover, I wanted to take a look at it with practical examples.
So, let’s have a look.
State
State can sometimes become quite large, and a lot of things are reading from/writing to it. The best way to observe it might look old school, but it’s quick and easy – a textarea placed right on the page.
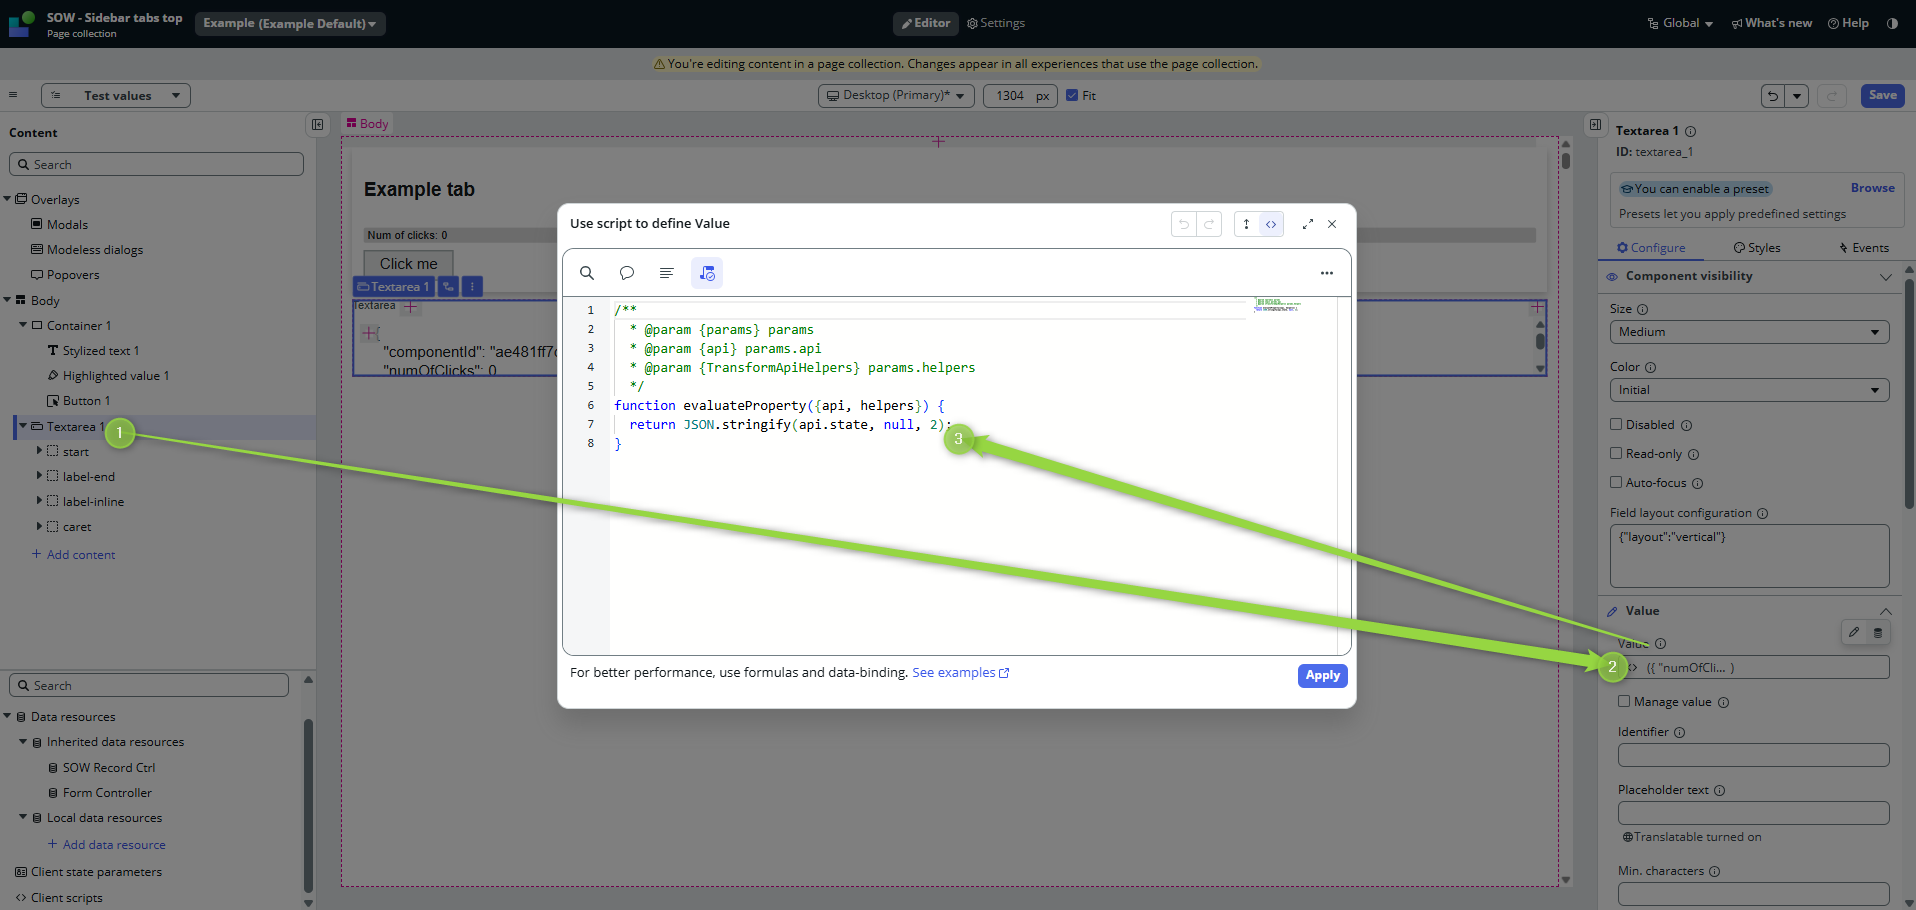
The example is very simple, but as soon as you have a lot of data resources with complex payloads saving their responses into the state with a lot of values, you will find this approach super useful.
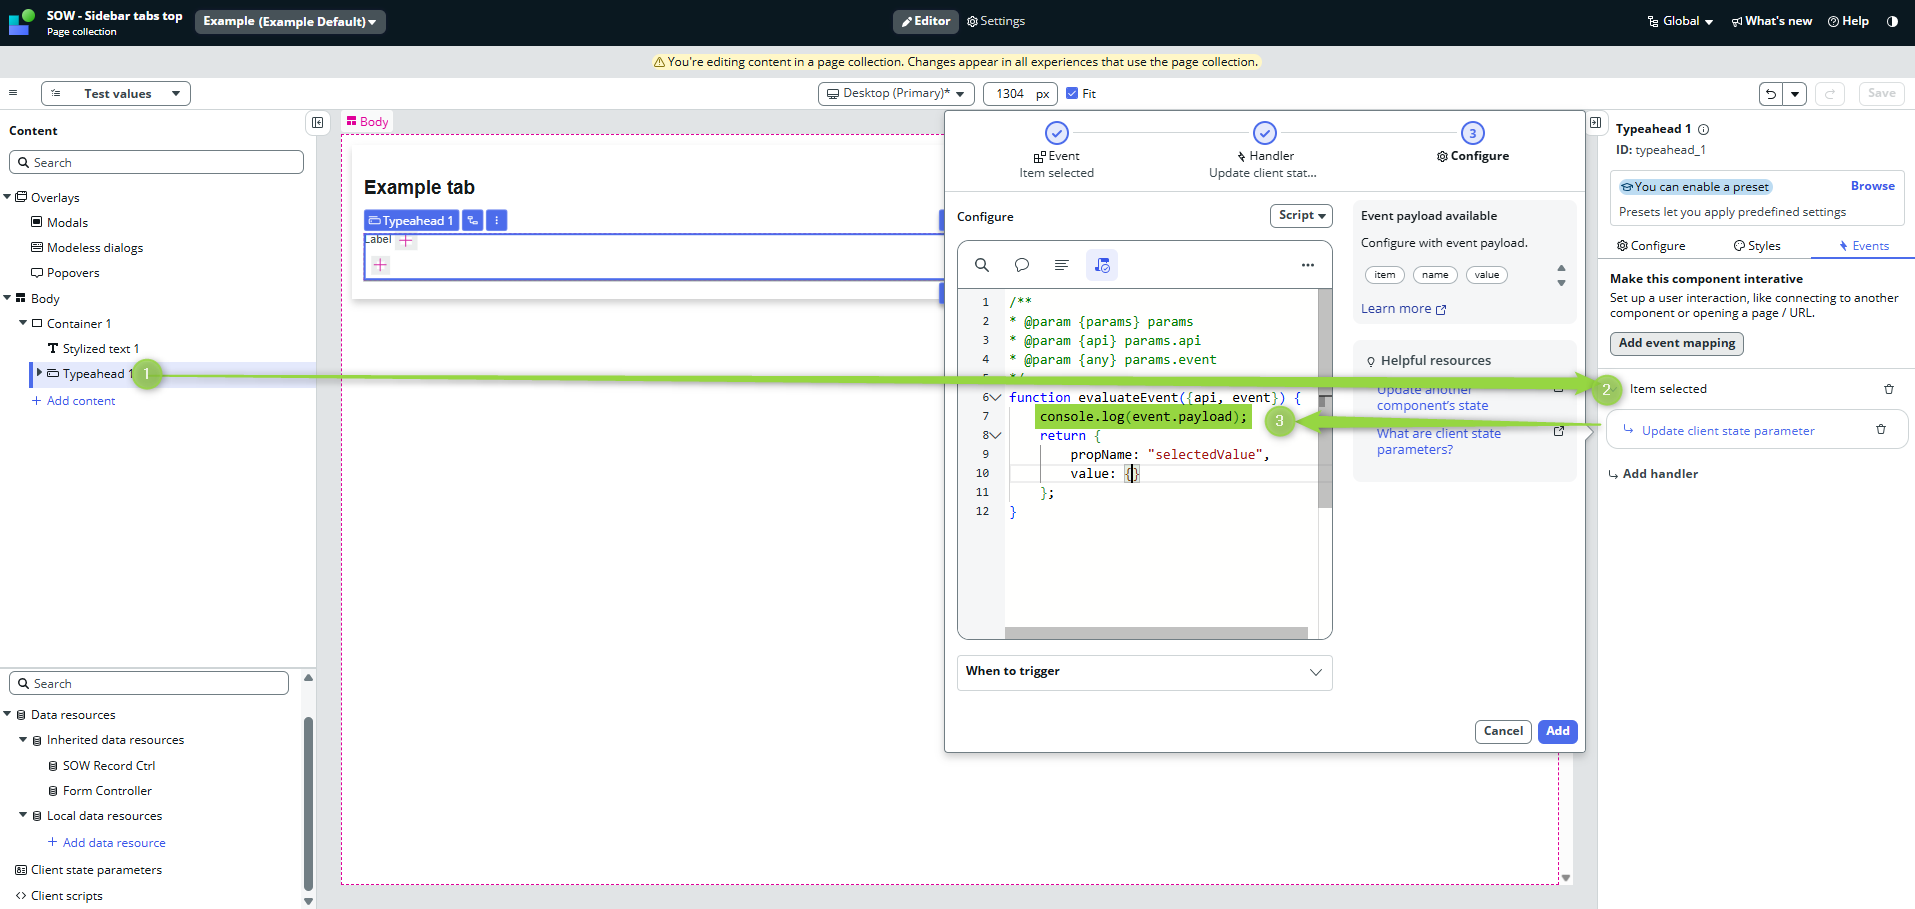
Event Payload from Built-in Components
Sometimes it’s tricky to find out what’s in the payload of this or that component. There is nothing easier than printing it to the console.
Response Form Data Resource
Data resources, especially those custom-created, can cause headaches. That’s why it’s important to know what they are doing and if they get event-triggered. Each data resource has the following three events, and they are basically try/catch blocks:
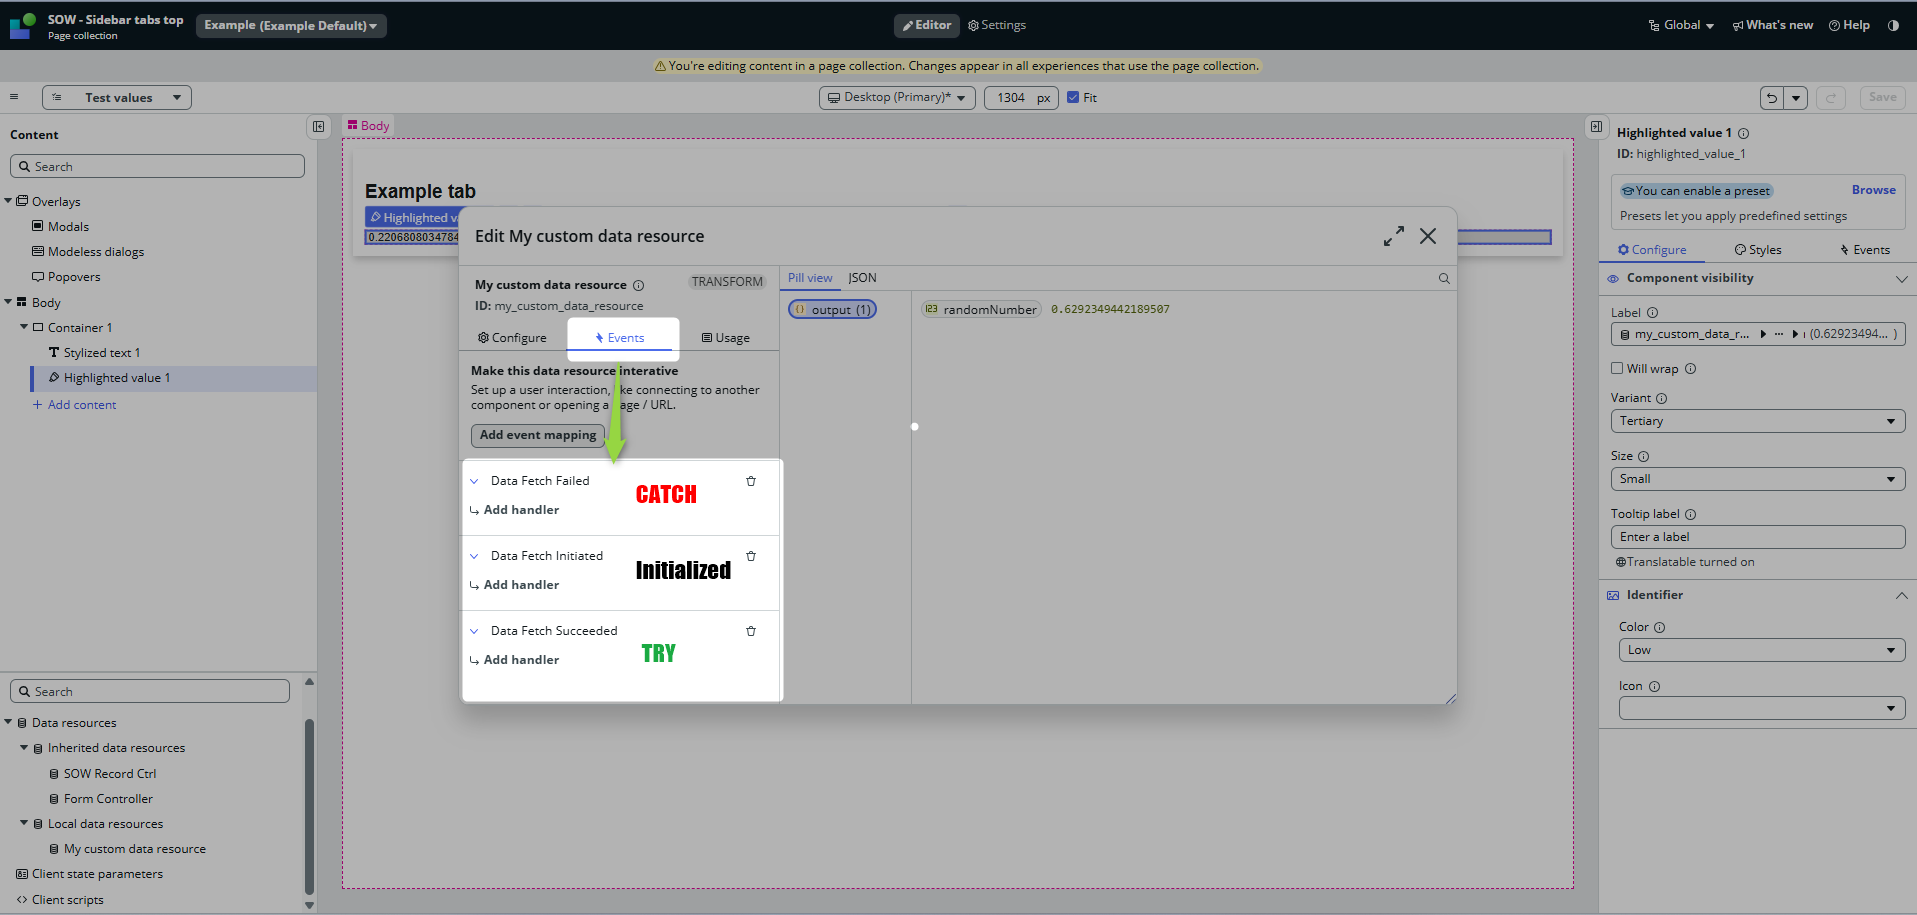
You can debug however you want (via console.log on the client, gs.log/gs.info on the Data Resource in the backend); I will use built-in alerts so we are sure we went the whole round trip back and forth.
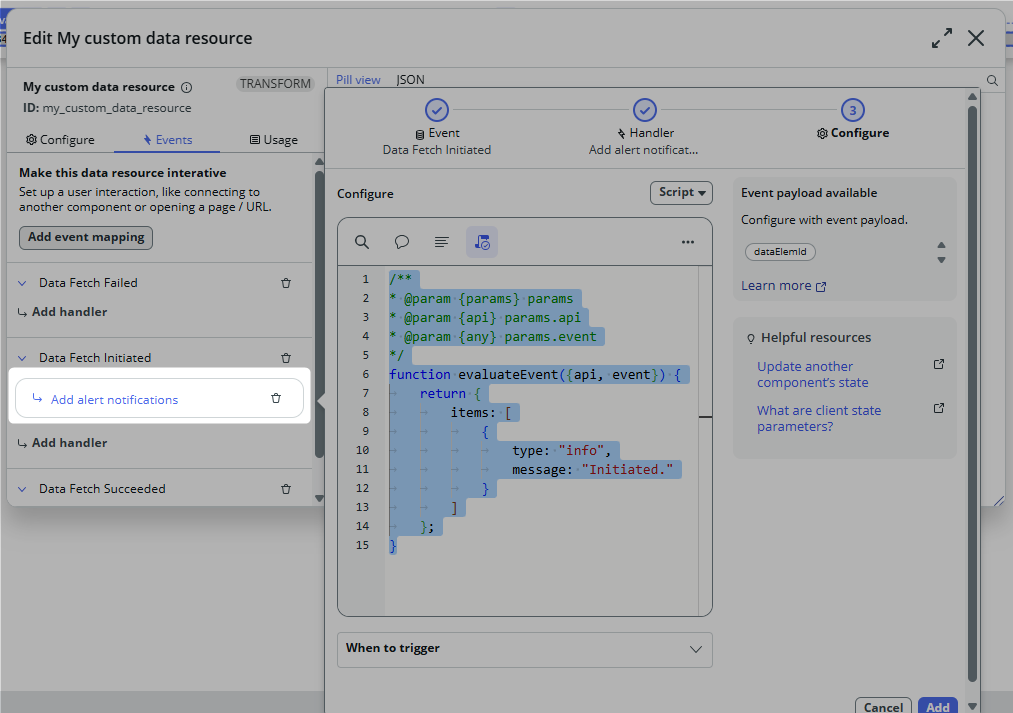
The syntax for adding alerts via “Add alert notifications” is still the same: an array of alerts. An alert is an object having a type and a message. The type can only be one of the following: info, warning, error.
More types can be used when firing the alert from the client script, but that’s for another blog post later 🫡
Initiated, Success
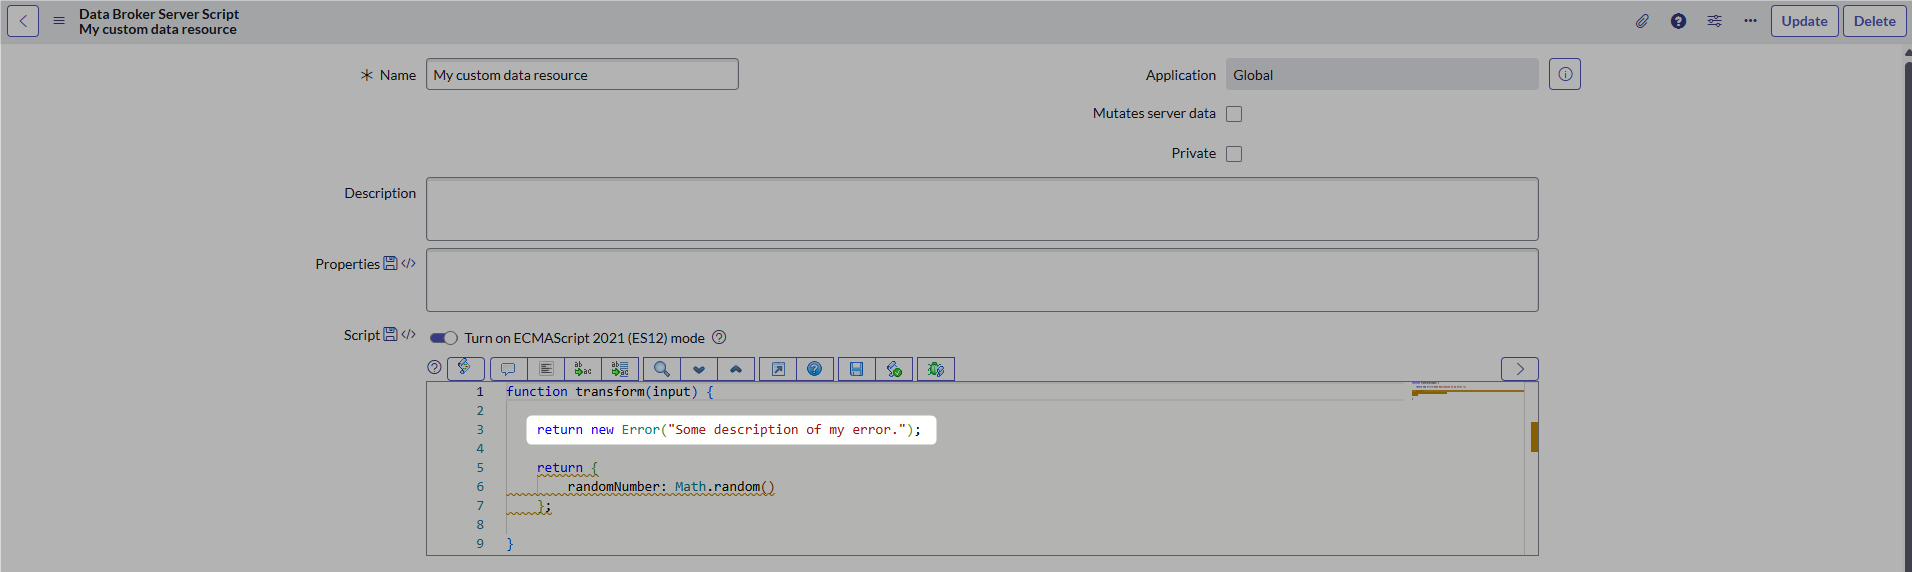
For this example, I created a custom data resource with the following code:
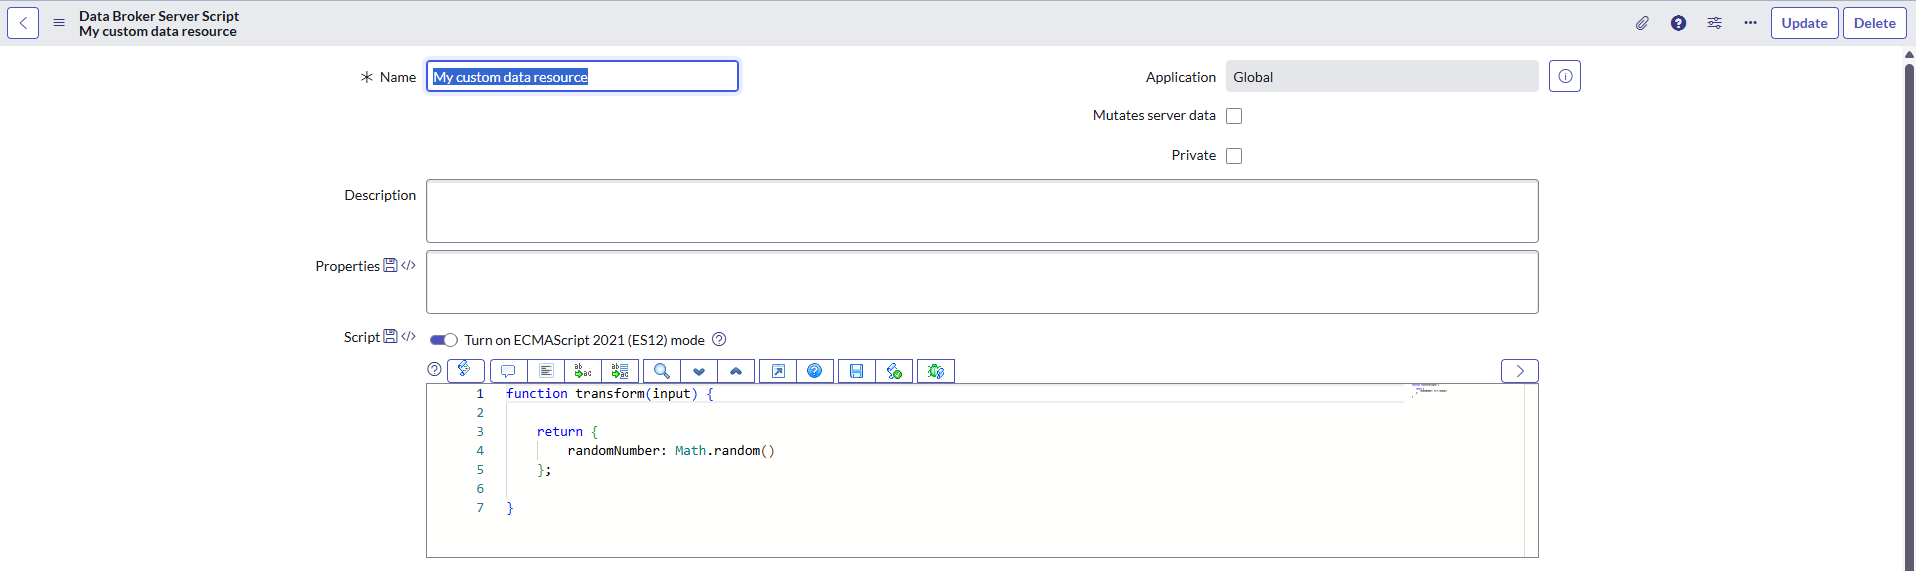
I set it in the UI Builder to be immediately invoked (the workspace will call it immediately after it loads).
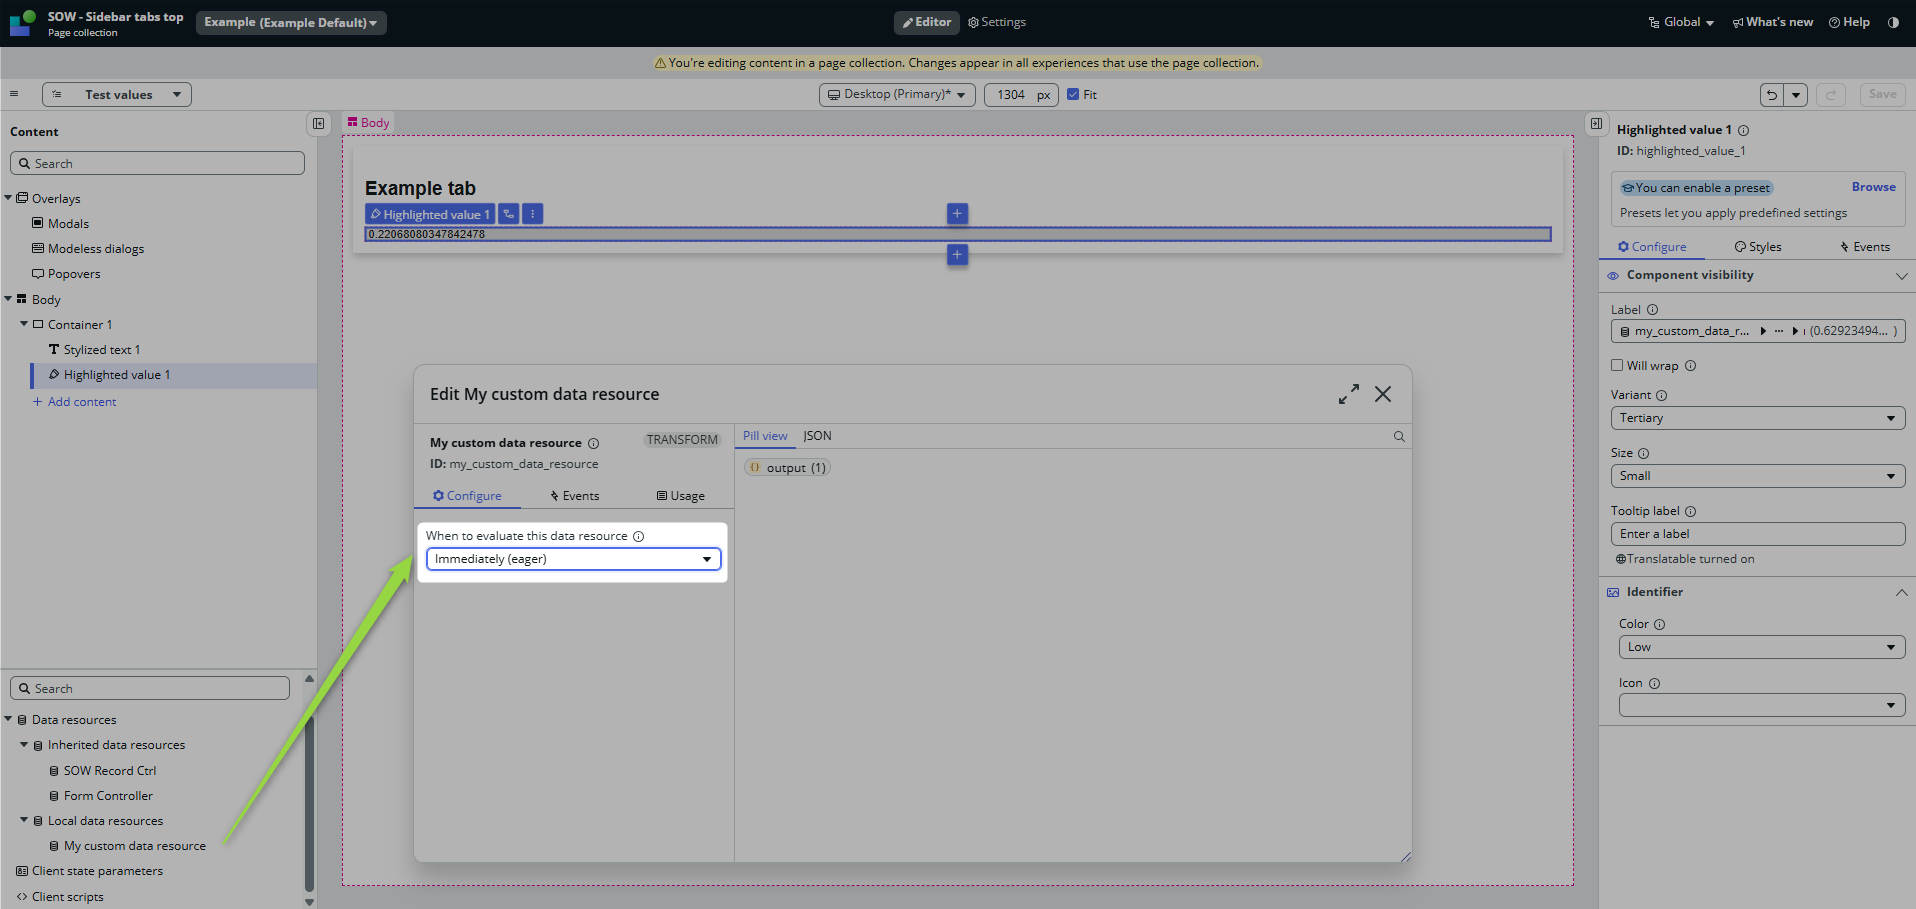
This approach gives me the option to bind the response directly to a component.
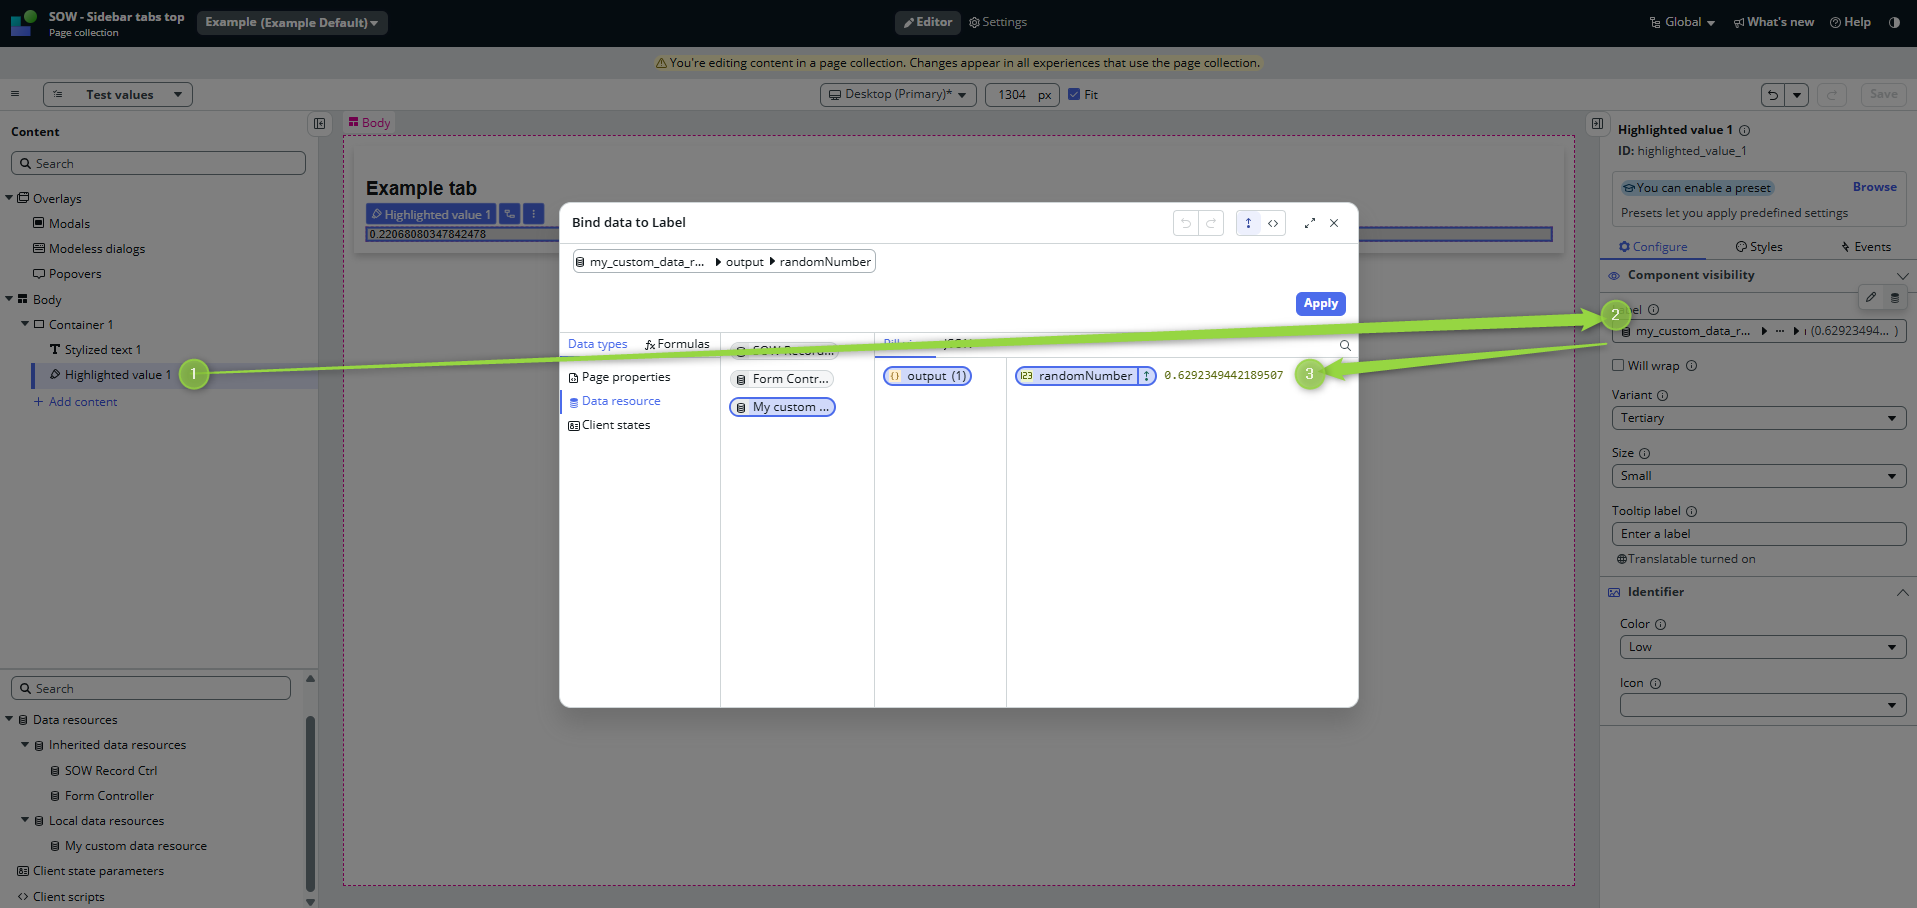
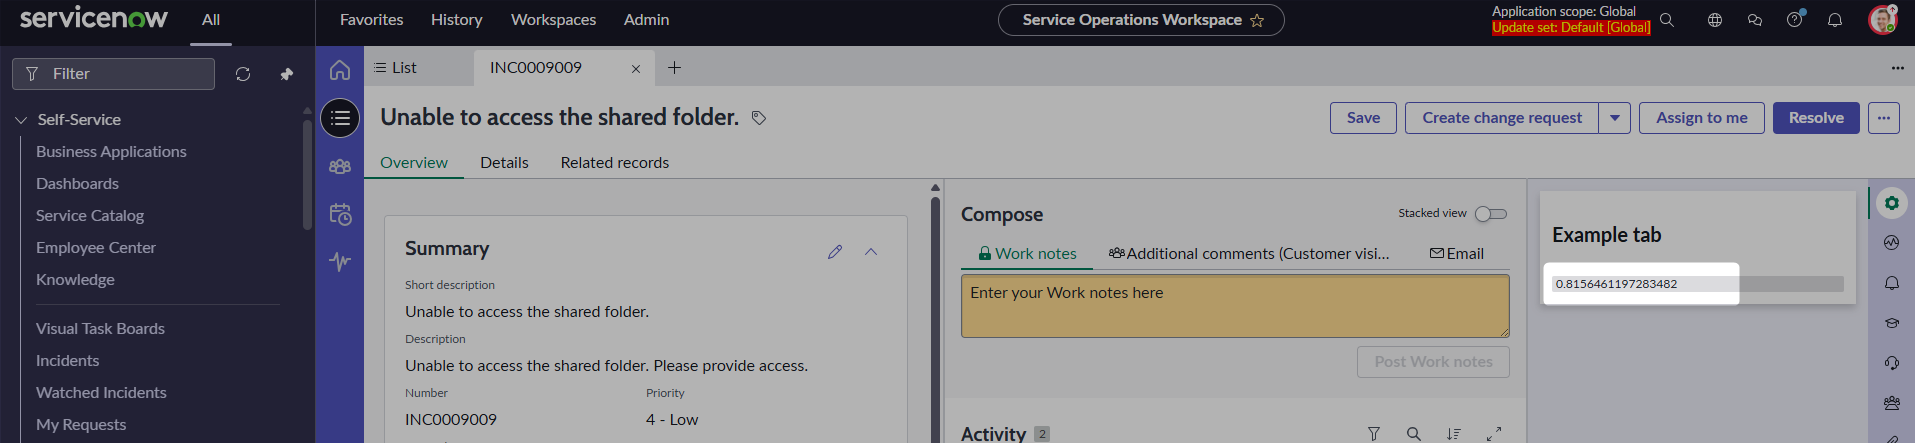
It will look like this 👇
When I refresh the page, the workspace will call my data resource, and as I implemented notifications for all three events, I should see them invoked like this 👇
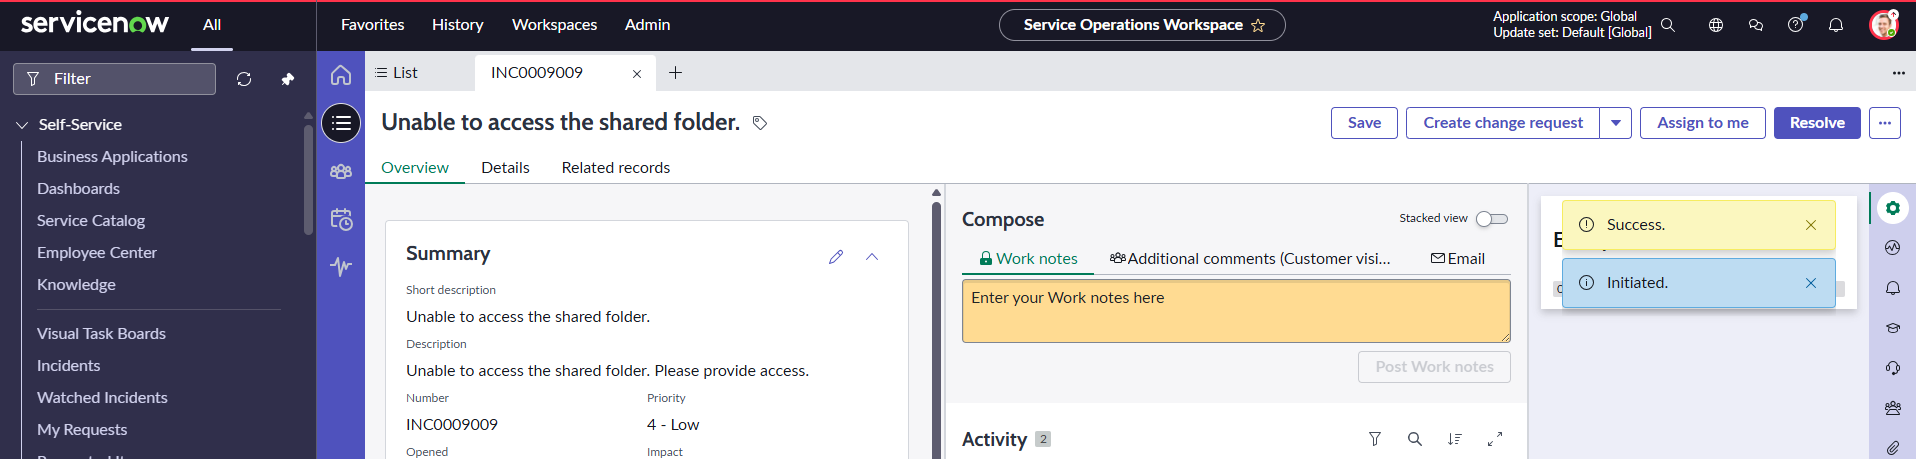
So now I am sure that my data resource was triggered and there was no error.
Error
To test the error handler, the Data resource must return the error, not throw it:
The workspace will show the Init notification and the Error notification:

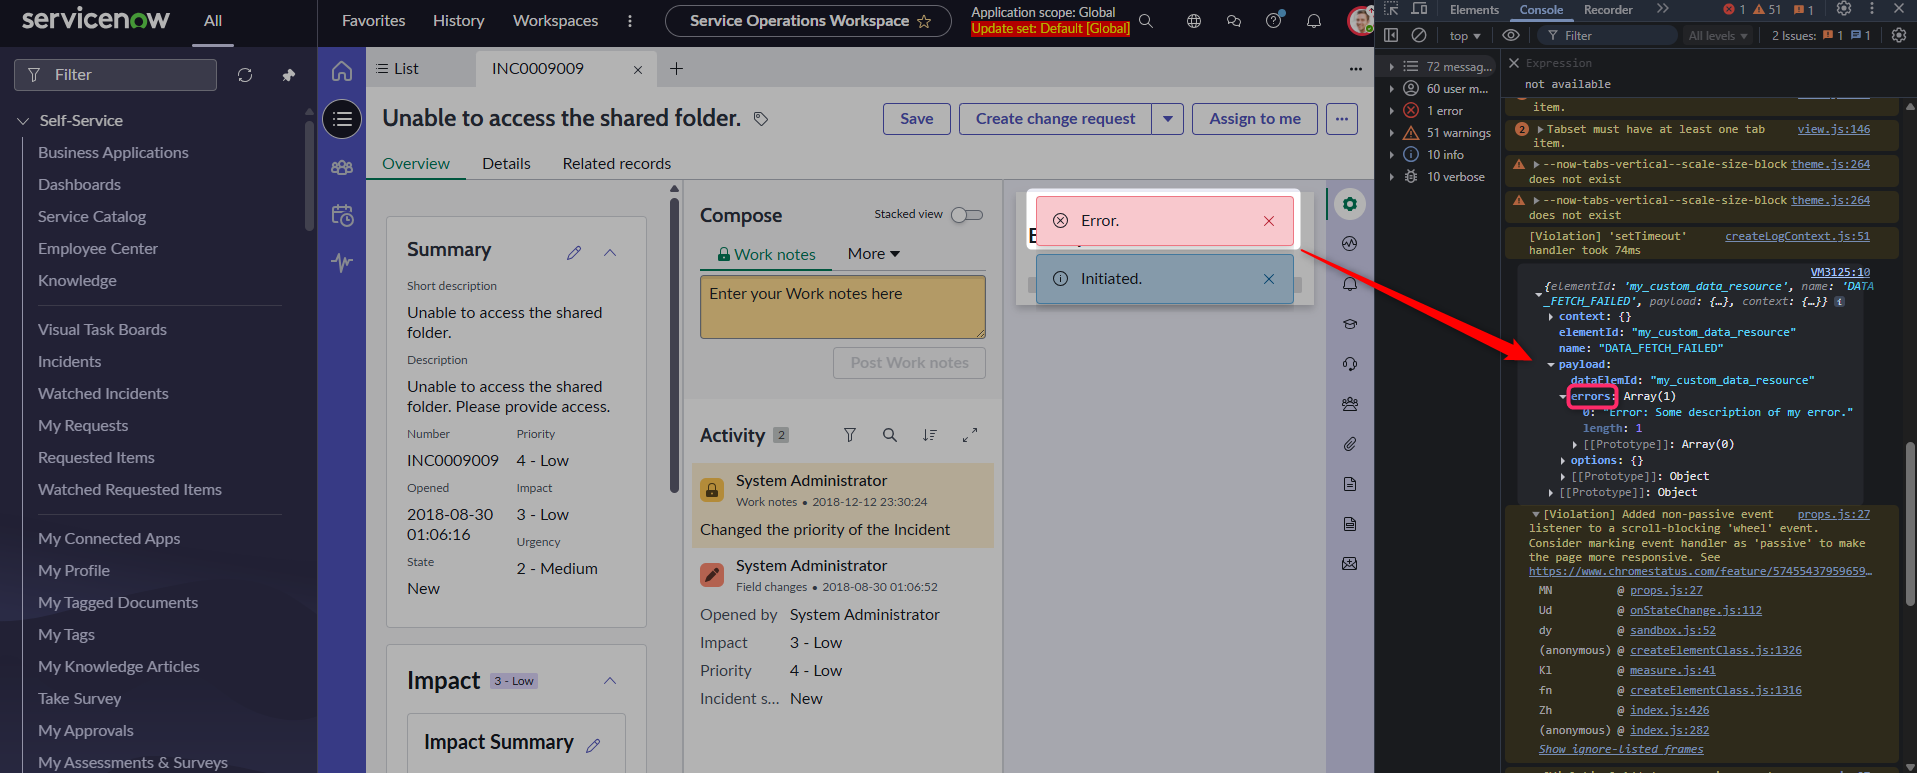
If you wanted to know how to get the actual error message, then you already know how to do it, right? Just use console log:
You will then see that there is an errors array in the event.payload.
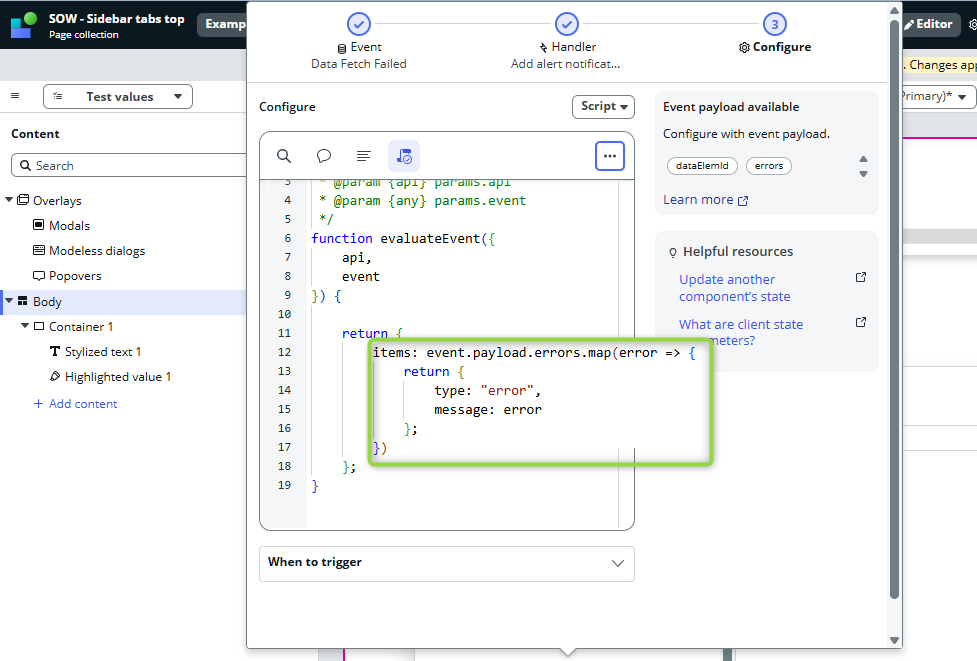
Then you can use it in your notifications, for example, like this:
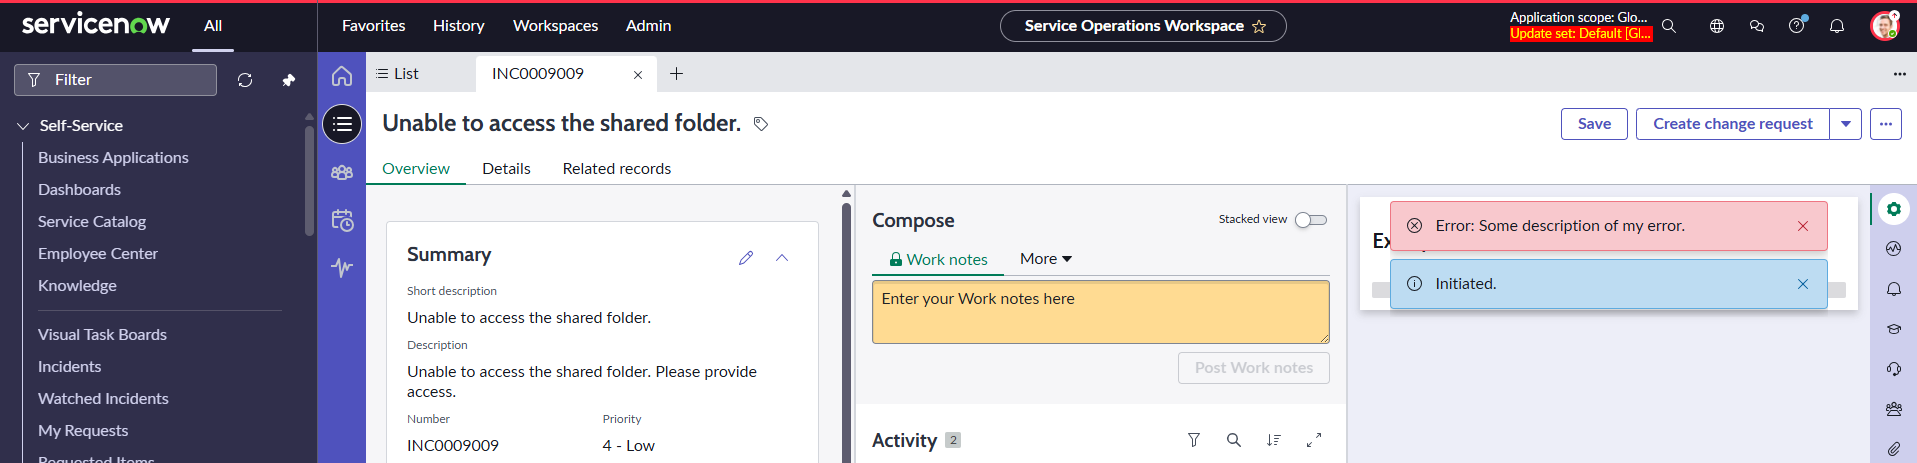
And it will give you your error message in the alert message:
Seting boolean state
For a long time, there has been a bug in the UI Builder regarding the boolean state. For example, I created a Loader component that shows up only when the isLoading state is true. I aimed to set isLoading true when my data resource starts and to have a button that sets isLoading back to false (to mimic a longer wait to see the loader).
When I go to the page, the loader stays even after I click on the button. Maybe you already know what happened; if not, just print your state in the textarea and you will find the reason: the state is a string, not a boolean…
It could be confusing – you set true/false via the form, but you did not set boolean values; instead, you set string values.
Idk when ServiceNow will fix this bug, but until it happens, use scripts to set your boolean values or use data binding, like in the example below 👇
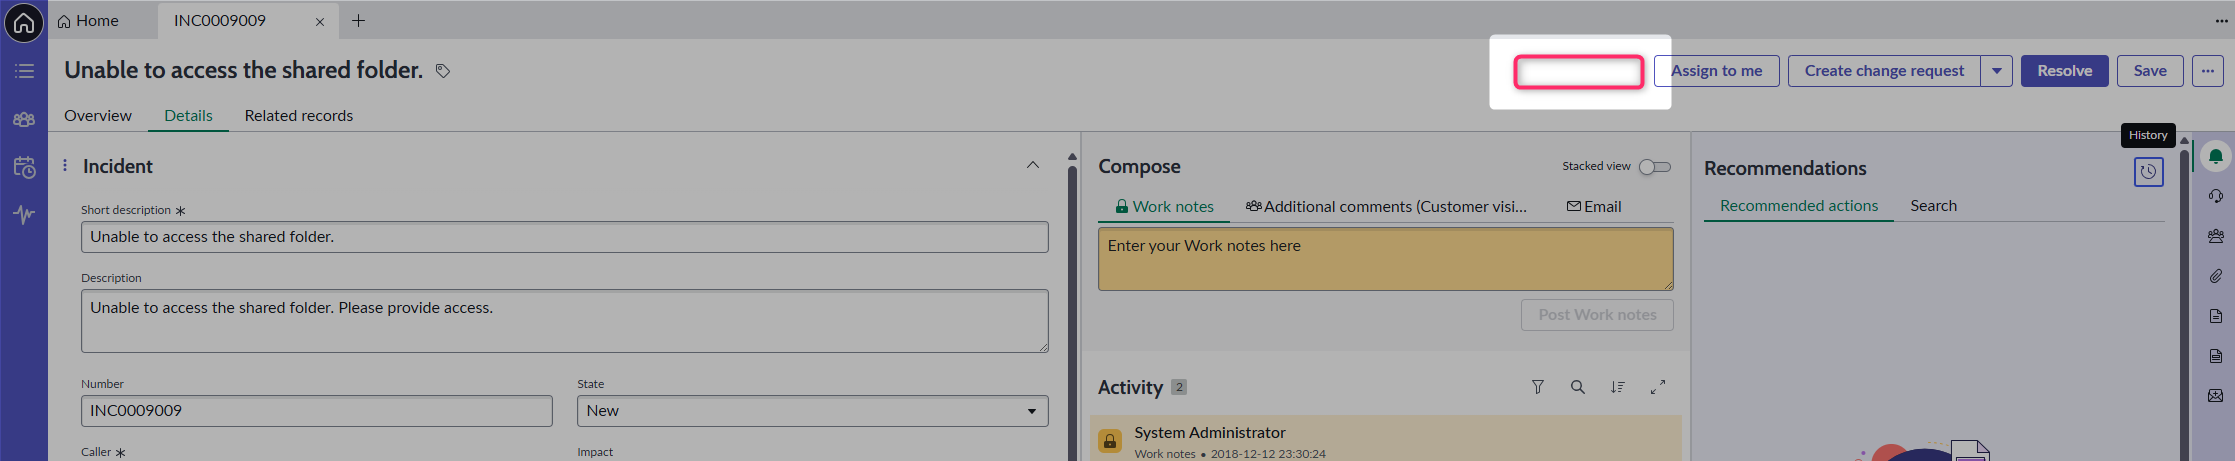
Missing Declarative Action
There might be multiple reasons for missing Declarative Action.
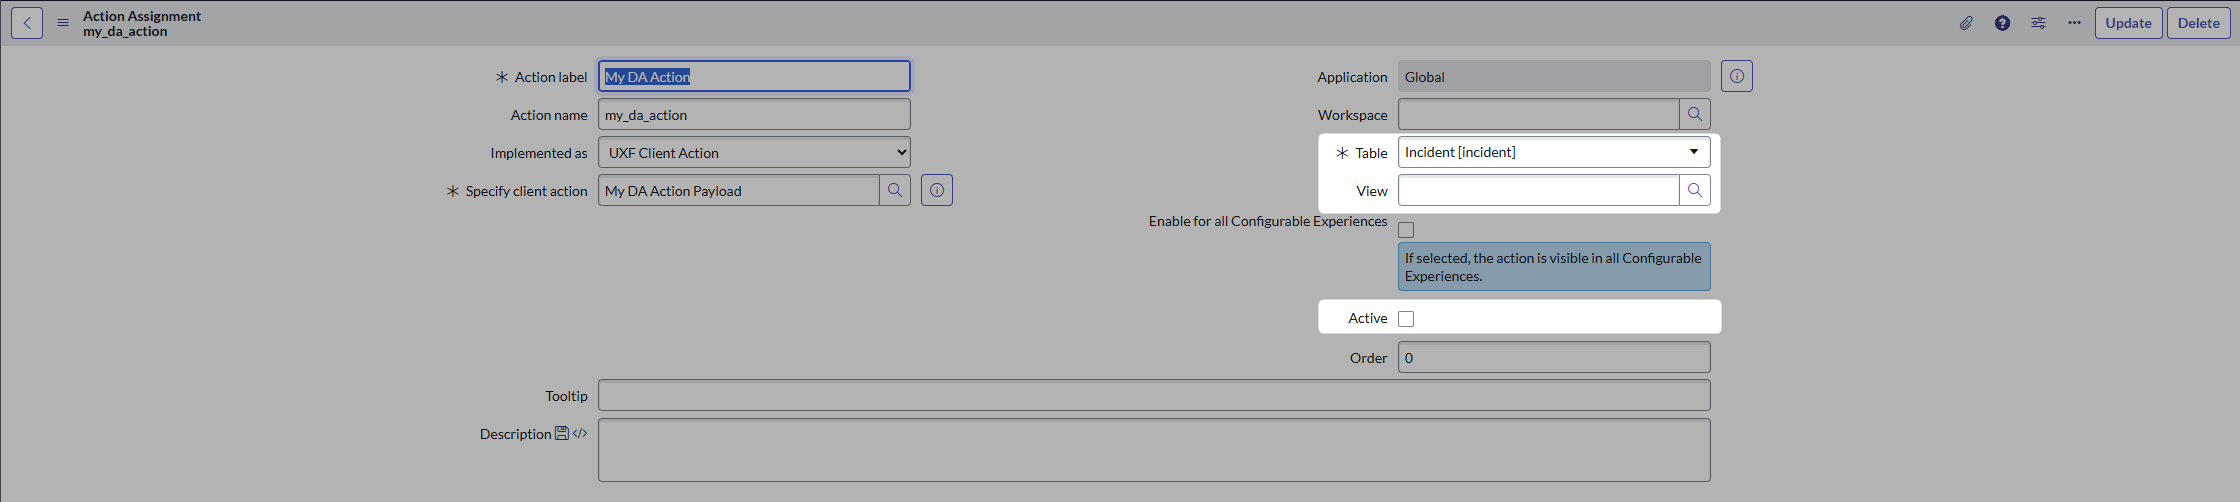
Table, View & Active
Those are the most straightforward fields to check first.
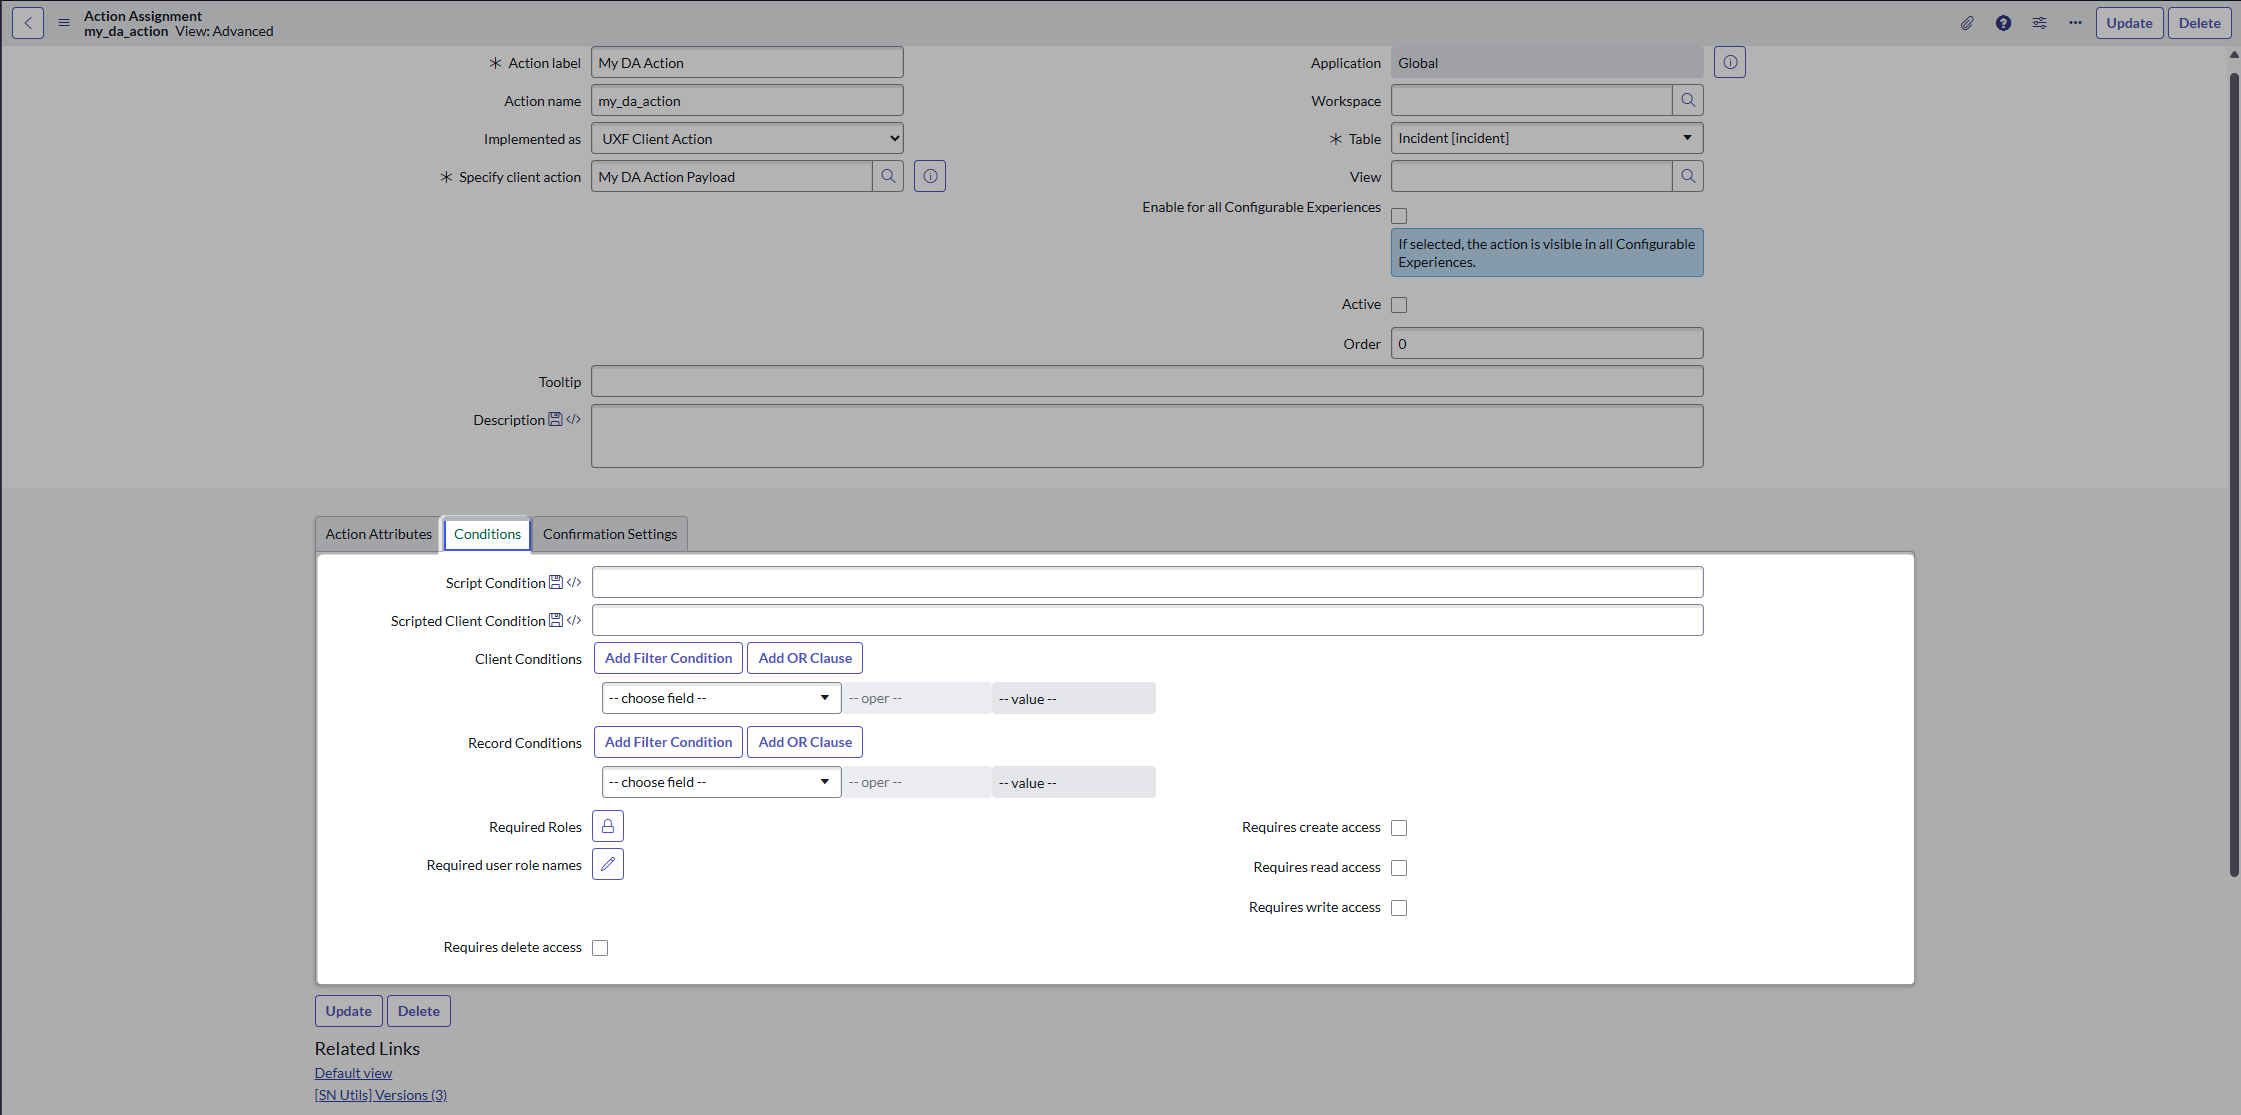
Conditions
If you click on “Advanced view” in Related Links, you’ll see another important section that drives the visibility.
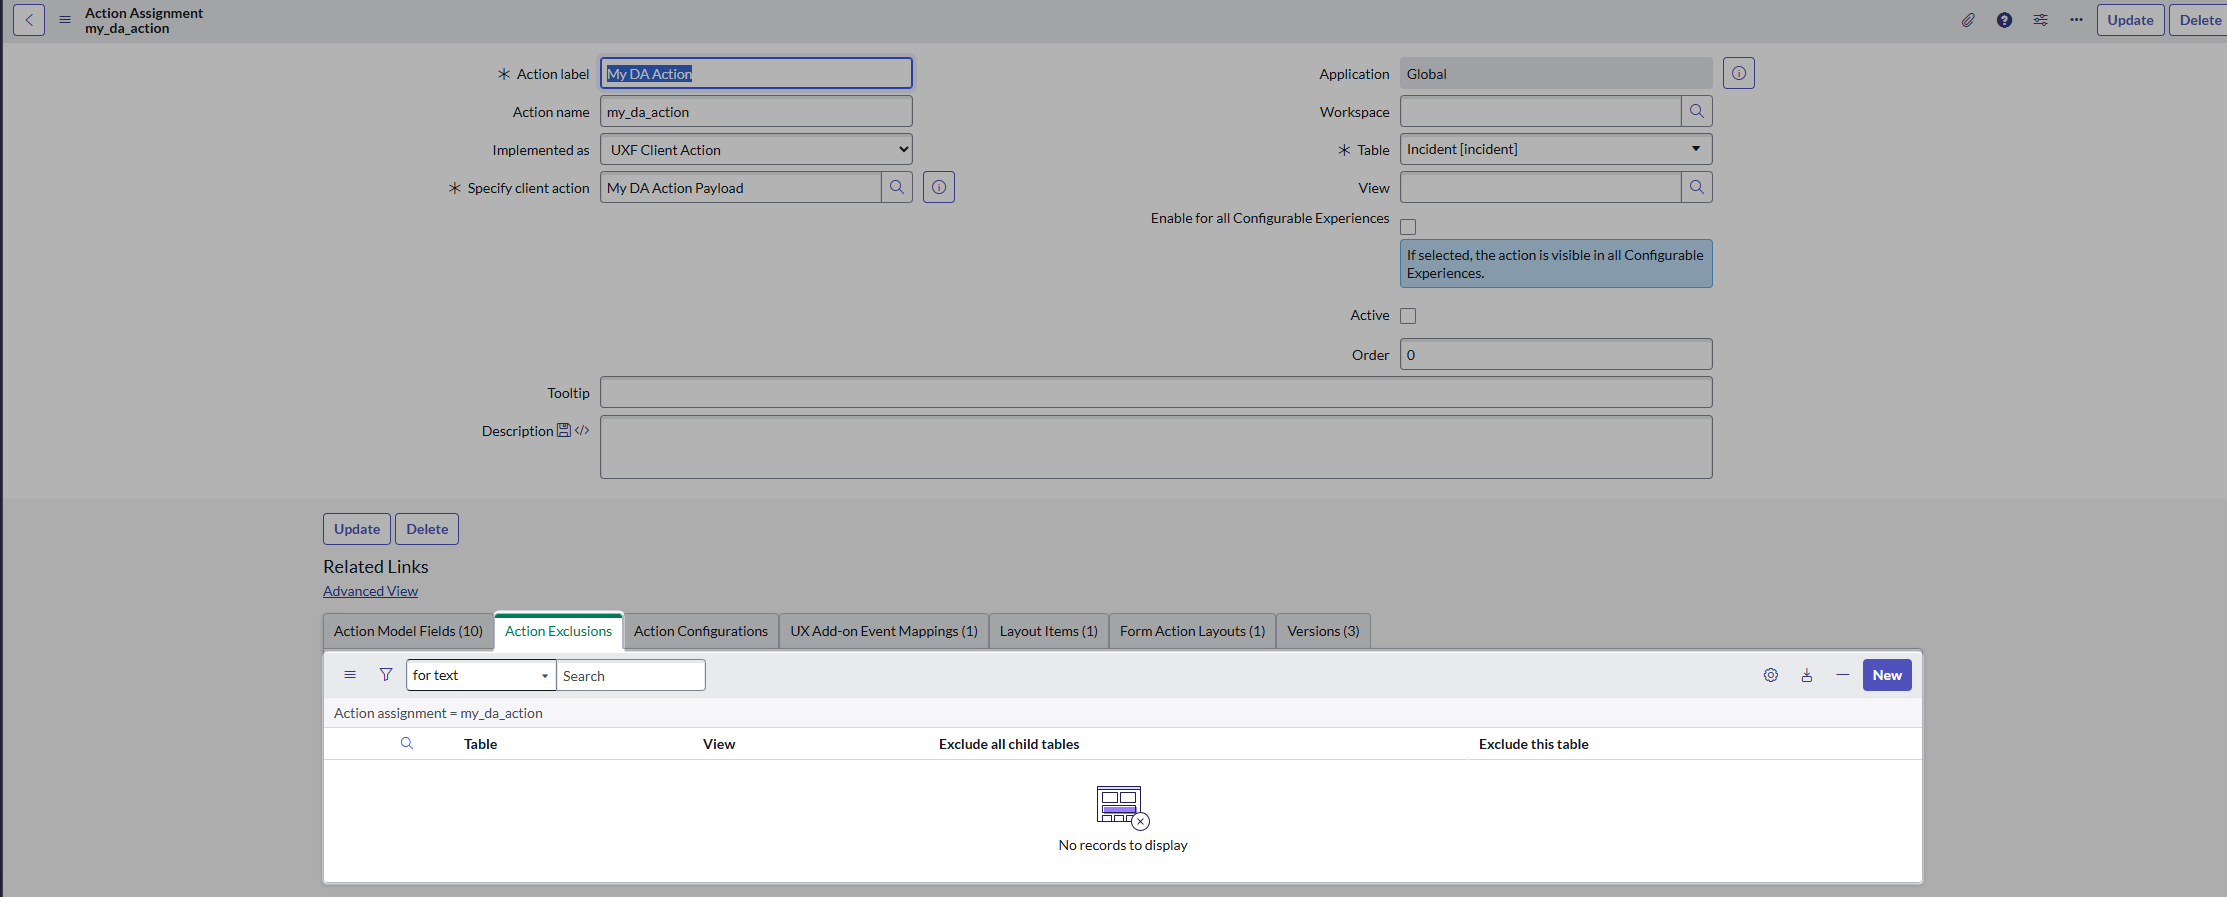
Action Exclusions
Don’t forget that visibility is driven by Action Exclusions as well.
UX Form Actions Layout
Configurable Workspaces have concrete structure for DA’s implementations. Follow this path 👇
- Everything starts in Experiences.
This is where you find your workspace.

- After you open it, go to the related list UX Page properties and find actionConfigId.
This is where you connect the Experience and Actions (buttons) configuration.

- The actionConfigId takes you to UX Actions Configuration table. This is where all layouts for Declarative Actions sit.
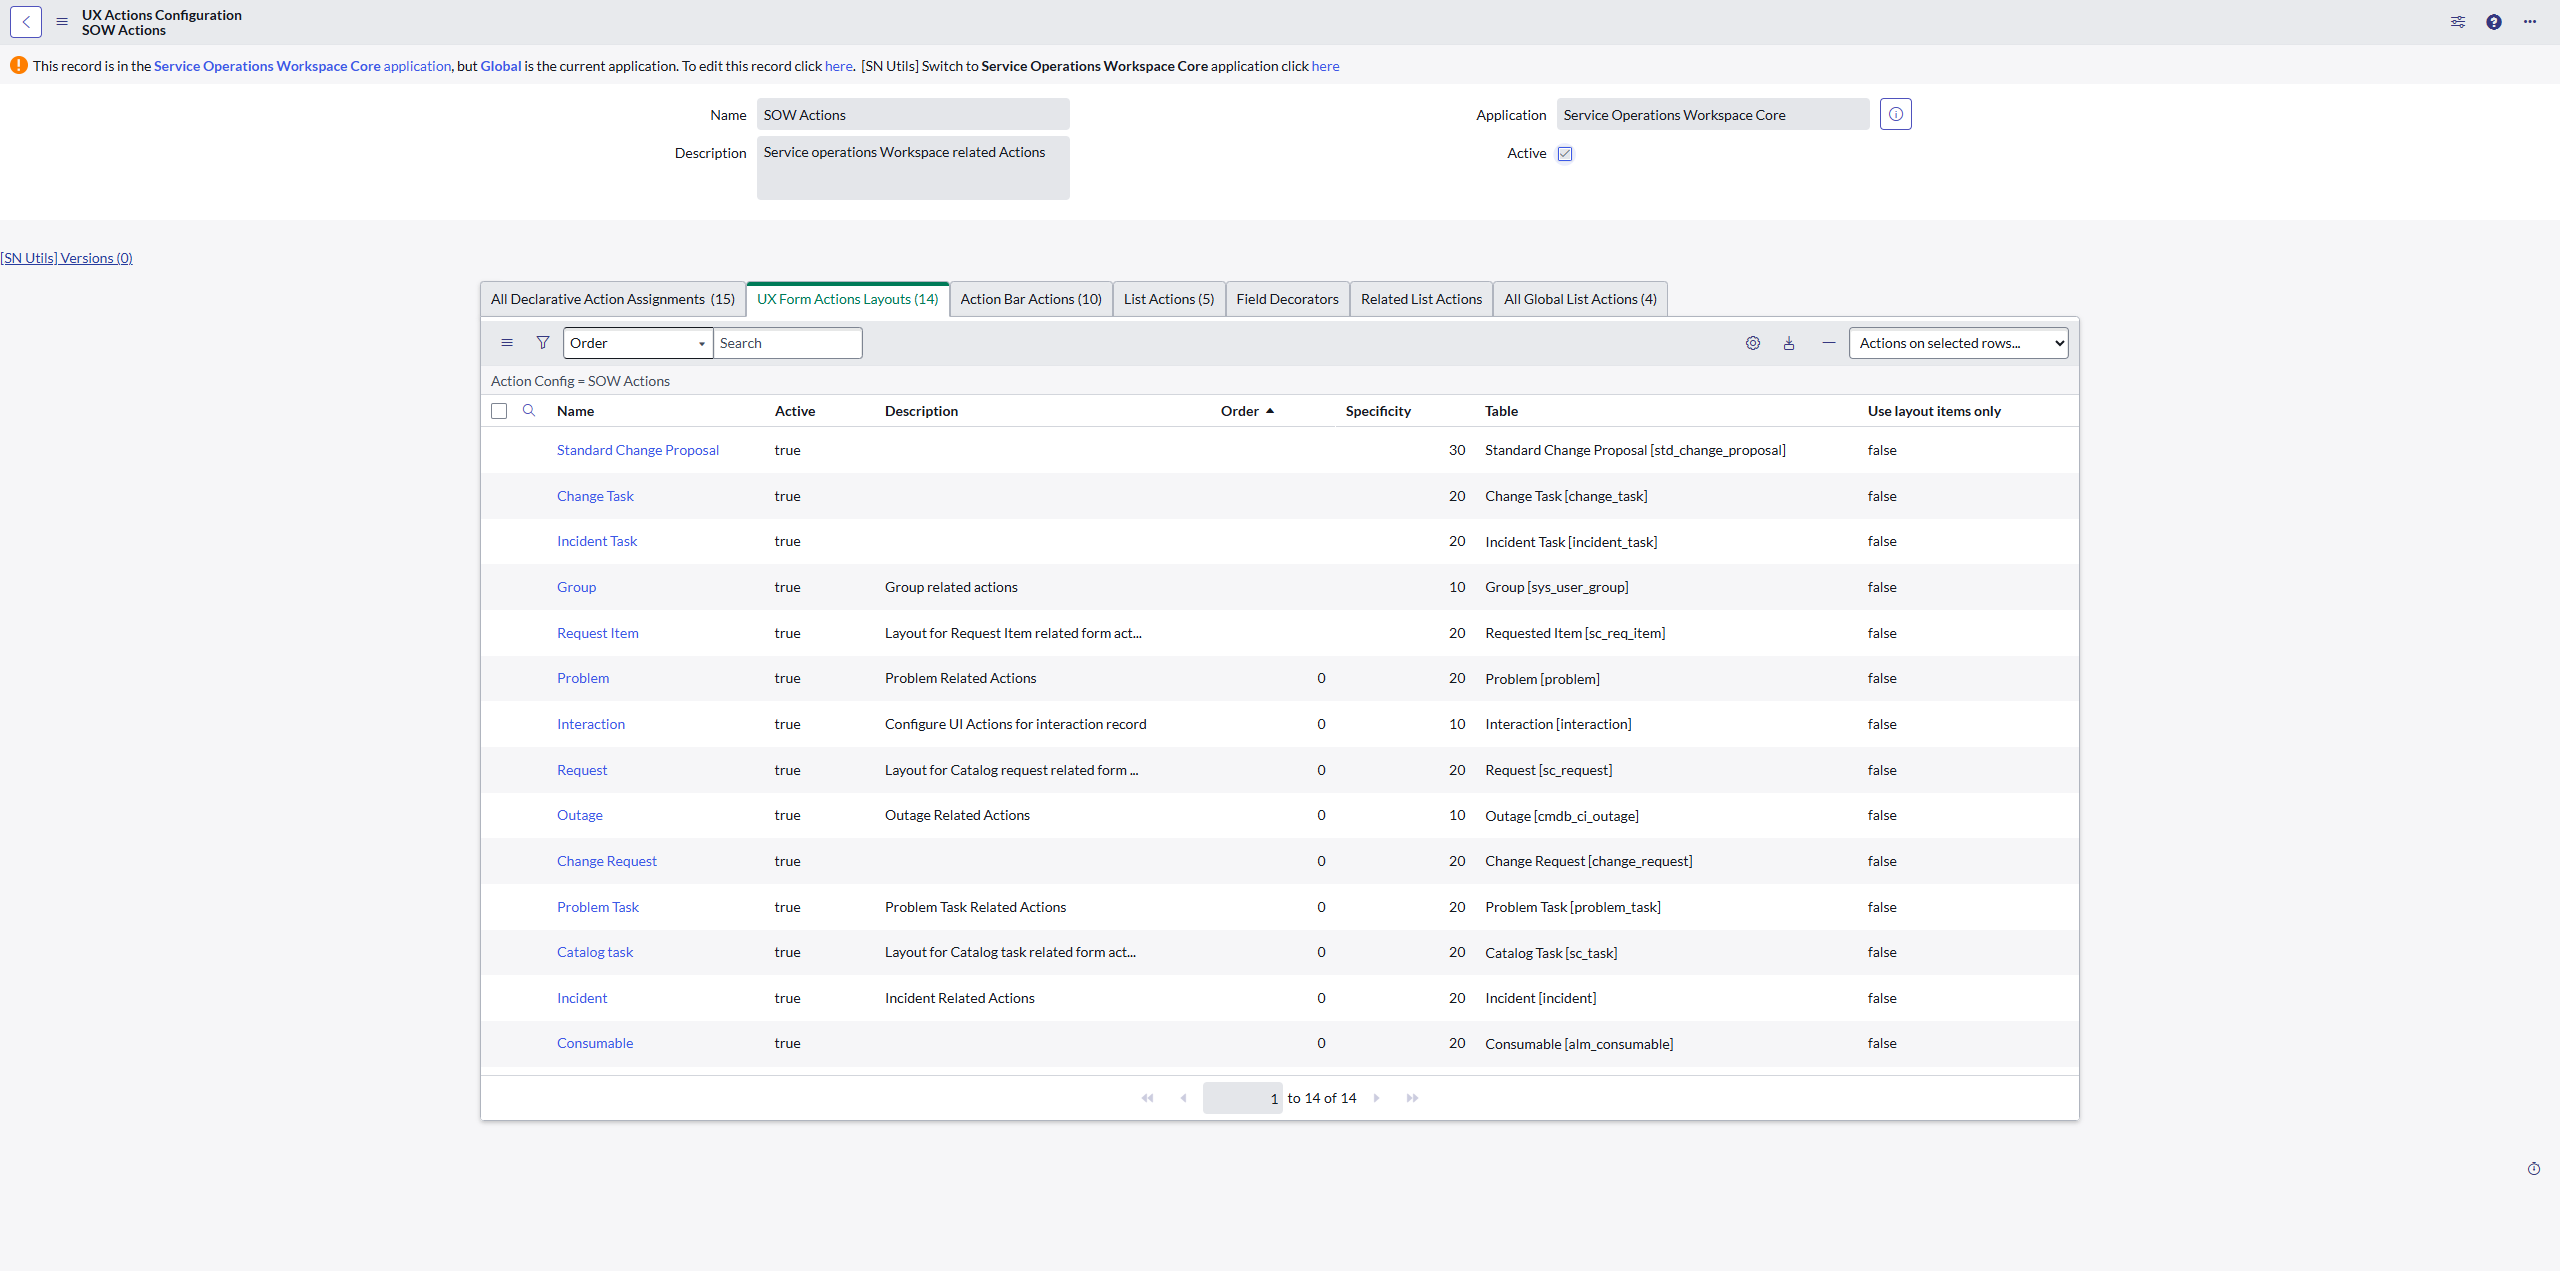
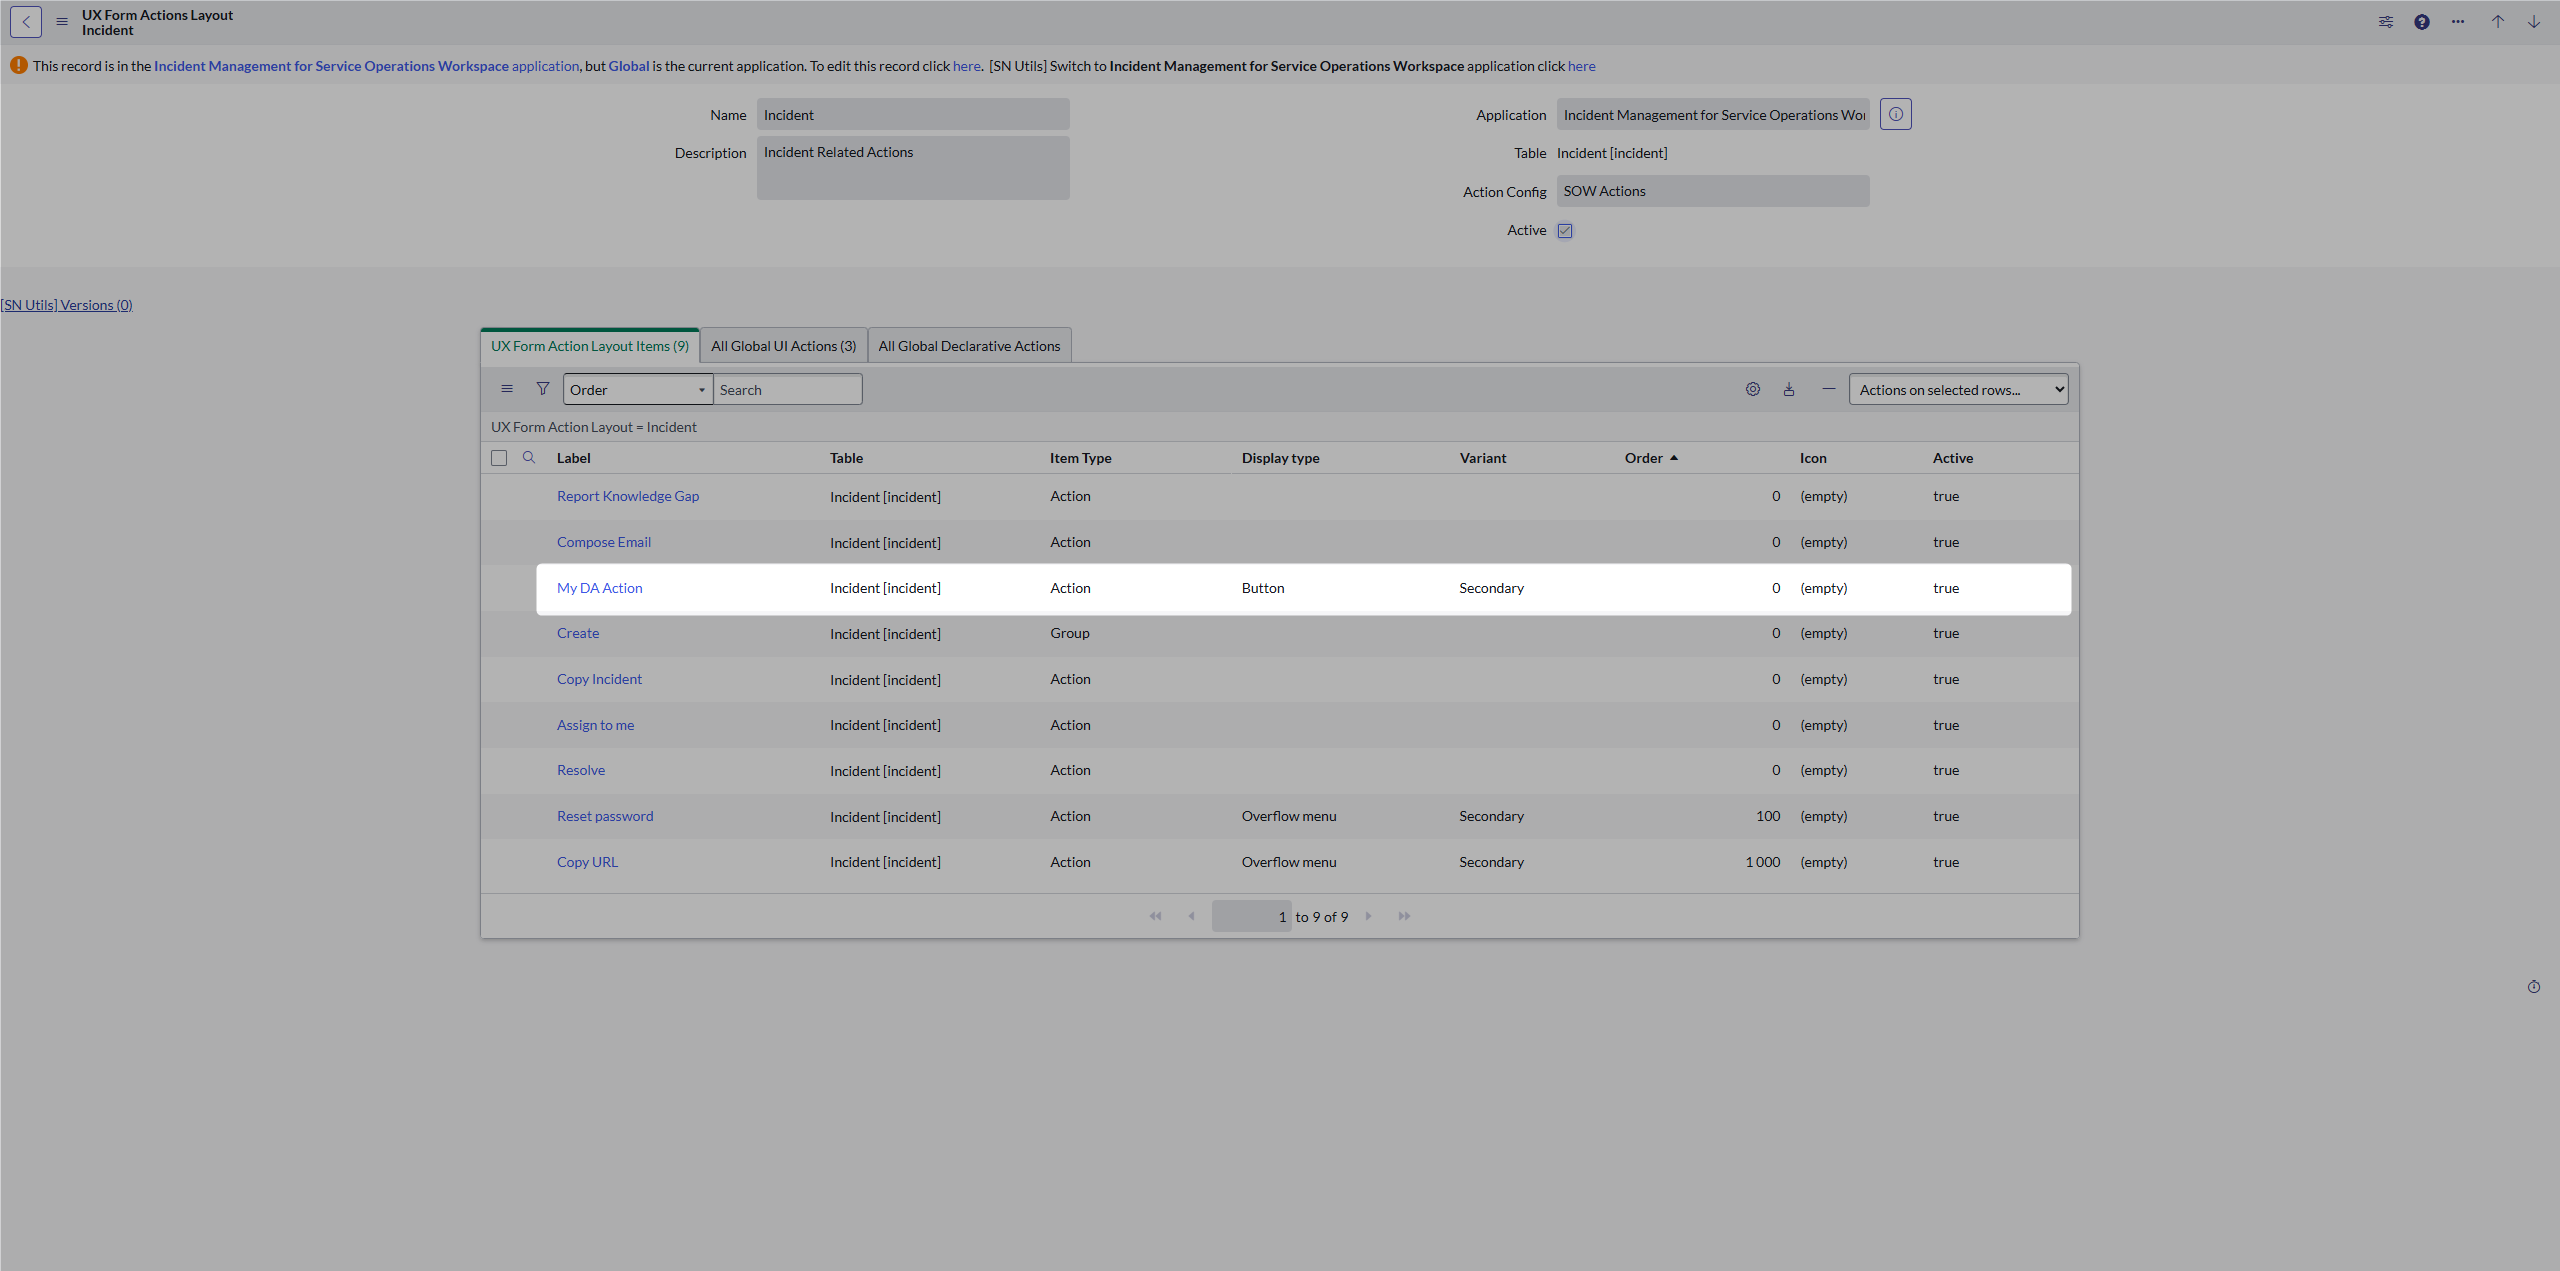
- So, check that there is an UX Form Action Layout Item for your Declarative Action. Without that, the workspace won’t know that there is some DA of yours and where to place it.
🎯Full path to check:
- [sys_ux_page_registry] to find your Workspace
- [sys_ux_page_property] with name actionConfigId to find to which configuration is your workspace connected
- [sys_ux_action_config] to access the Layout you would like to check (Incident, for example)
- [sys_ux_form_action_layout] to see the Layout
- [sys_ux_m2m_action_layout_item] to check there is connection between the Layout and Layout Item of your Declarative Action
- [sys_ux_form_action_layout_item] must exist for your Declarative Action in order to connect it with the Layout.
That’s all for now; but of course there’s more, so stay tuned! 😎
Jan

Leave a comment